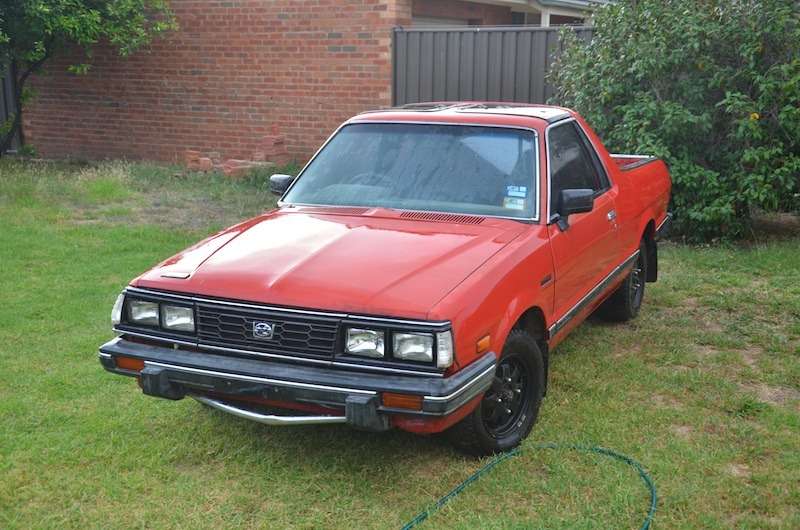
Red Targa Brumby

Moderator: El_Freddo

User avatar
El_Freddo
Master Member
Posts: 12502
Joined: Tue Oct 04, 2005 10:00 am
Location: Bridgewater Vic
Contact:

Post by El_Freddo » Sat Feb 22, 2014 7:38 pm

Well an update!

It's alive!!! Just.

Thursday I got a few hours in the shed - and on the back of an awesome day at school it was loads better than a drink or two to celebrate. The engine was a long block when I started, by the end of it I tried to fire it up - which it tried but kept dying. I figured I needed a fresh battery or a jumpstart and some good fuel.

Today was that chance. I quickly worked out that there was an issue with the ignition as it would fire up then die when I disengaged the starter motor. By holding the edge of the starter switch I could keep it running - it was bloody rough but it ran. Then I smoked the shed out :(

So I took it outside and did the same to the back yard. I was a bit disappointed as there was so much smoke it was pretty consistent - I was imagining stuffed oil rings but it eventually came good. Now the issue is that it's running so rough. If I remove cylinders 2 and 4 from the dizzy it runs the same. I've swapped spark plugs and leads over without any change in performance.

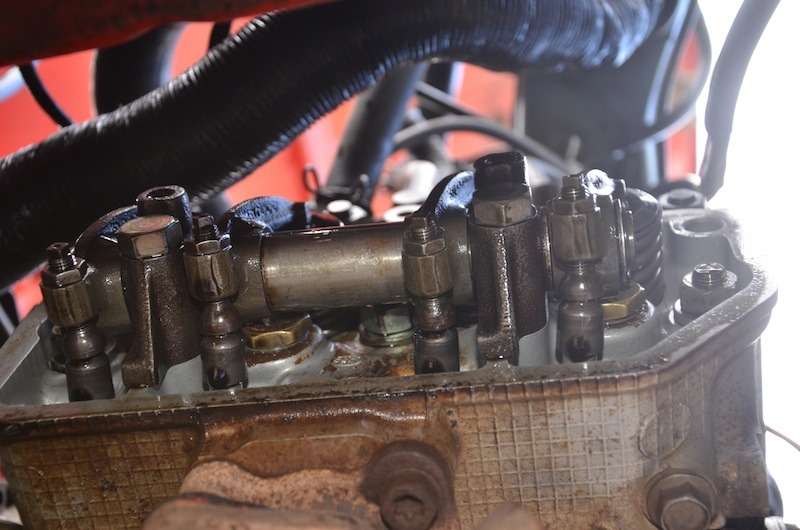
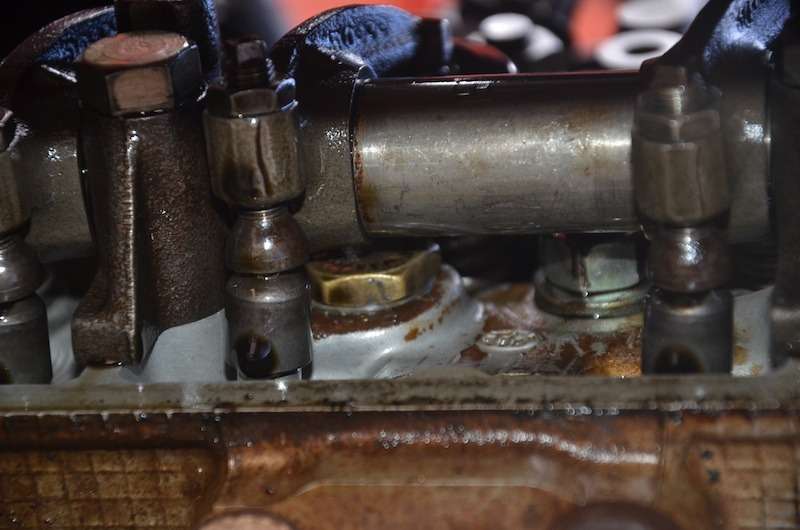
Now I'm going to mess around with valve clearances to see if I can get it to run on both sides of the engine...

I've also checked the firing order for the EA81 - 1, 3, 2, 4 - dizzy rotor moves in an anticlockwise direction ;)

Cheers

Bennie
"The lounge room is not a workshop..."
Image
El Freddo's Pics - El_Freddo's youtube

User avatar
Subydoug
Junior Member
Posts: 988
Joined: Wed Feb 08, 2012 10:19 pm
Location: Carlisle WA

Post by Subydoug » Sat Feb 22, 2014 8:53 pm

Yep the firing order is definitely 1324. Just go thru the ignition system backwards and you'l find your problem. If its running really rough chances are there is some form of compression in the cylinders that arnt firing.

With the key switch, I donno about brumby's but some cars have a relay that bypasses the ballast resistor when cranking to give the best spark. If your ballast resistor is crapping out then that could be the cause. Sticking your multimeter on the +12v terminal on the coil while trying to start it will show if the voltage is dropping off when you finish cranking. If it isnt dropping off after releasing the key then check your static timing.

Pretty sure you got it though ;).

Regards

Doug

User avatar
Silverbullet
Senior Member
Posts: 2867
Joined: Mon Aug 23, 2010 6:20 pm
Location: Adelaide

Post by Silverbullet » Sat Feb 22, 2014 10:10 pm

Yeah the MY's and Brumbies have the same thing when you crank it there's a bypass circuit for bigger spark on starting. Bennie is it points or electronic? might pay to try another resistor if its points or maybe even another coil, double check the wiring going to the coil is in the right order. Again if it's points check that the little insulated wire inside the dizzy is actually insulated all the way out and not shorting on the dizzy body.
Will it ever end!?
-EA81 TWIN CARB!!!!
-L series 5 speed
-Custom paint job
-2" lift
-Full custom re-wire
-L series front end
Image

User avatar
El_Freddo
Master Member
Posts: 12502
Joined: Tue Oct 04, 2005 10:00 am
Location: Bridgewater Vic
Contact:

Post by El_Freddo » Sun Feb 23, 2014 12:01 am

Thanks for the ideas guys. I've got the electronic dizzy and I reckon the spark/leads are good.

Before I got this thing going I did say to my wife that it doesn't sound like it's cranking right - once it started that was confirmed. Now just to get to the bottom of it.

I'm at the point where I think it's either valve gapping (didn't touch it after replacing HGs) or it's compression on that side of the engine. I'm hoping it's valve gapping!

Cheers

Bennie
"The lounge room is not a workshop..."
Image
El Freddo's Pics - El_Freddo's youtube

User avatar
steptoe
Master Member
Posts: 11582
Joined: Thu Oct 06, 2005 10:00 am
Location: 14 miles outside Gotham City

Post by steptoe » Sun Feb 23, 2014 7:04 am

timing in question ?

the smoke is your generous assembly lube I hope

User avatar
El_Freddo
Master Member
Posts: 12502
Joined: Tue Oct 04, 2005 10:00 am
Location: Bridgewater Vic
Contact:

Post by El_Freddo » Sun Feb 23, 2014 8:13 pm

steptoe wrote:the smoke is your generous assembly lube I hope
I don't remember reassembled engines pouring out this amount of smoke - thick and very blue! Looked like the shed was on fire and I'm glad the neighbours didn't call the CFA!

The amount of smoke it poured out had me thinking that the oil rings were completely shot. But after running it a good 15 minutes it was down to a minimum of smoke, still a bit blue at this stage too.
El_Freddo wrote:I'm hoping it's valve gapping!
Well, it was valve gapping! I did the passenger's side by feel as I CBF'd using the gauges as I still wasn't 100% sure this engine would be a goer for the road worthy. After messing around with this it fired up without an issue - no noise on the side I did so I think they're still a little tight but at least it's running on all four pots.

There was a little bit of blue smoke, I was initially worried but let it run and it's cleared up - so a non smoker it is :twisted:
steptoe wrote:timing in question ?
Nah not really. I have messed around with it by ear once it was on all four again - I'll steal the timing light from dad's next weekend and give it a proper tune up. It's running pretty good in the little bit of a drive up and down the driveway I've had. Power steering makes an amazing difference in these vehicles!!

This arvo I've spent putting the interior back together. I worked out that the "electrical gremlins" I thought I had were just missing fuses I pinched for Ruby Scoo about 6 months ago :rolleyes:

Very excited though. The list of things needed looks like this:

- water pump,
- ball joints
- rear diff seals replaced
- front right hand guard, in red, needs replacing with a straight one that's not got any holes in it. If I can't find one or it's too expensive I'll stick with the rusty white one I've got.
- brakes checked
- engine and gearbox mounts (found out through fleabay adverts they're the same for EA81 and EA82s - so I'll grab some from M&D's when I'm back with my stash)
- and work out why the second thermo fan doesn't switch on, even when the AC is in use it's not engaging. The fan checks out as working well.

Really looking forward to getting this on the road!

Cheers

Bennie
"The lounge room is not a workshop..."
Image
El Freddo's Pics - El_Freddo's youtube

User avatar
Silverbullet
Senior Member
Posts: 2867
Joined: Mon Aug 23, 2010 6:20 pm
Location: Adelaide

Post by Silverbullet » Sun Feb 23, 2014 9:31 pm

Sounds great! As for the smokey start up well you never know what could have still been sitting inside the heads/bores judging from the first few pictures in this thread. Careful on the g/box mounts; L series and MY are not the same, L series having the slanted angle on them.
Will it ever end!?
-EA81 TWIN CARB!!!!
-L series 5 speed
-Custom paint job
-2" lift
-Full custom re-wire
-L series front end
Image

User avatar
Point
Junior Member
Posts: 311
Joined: Fri Nov 10, 2006 7:44 pm
Location: Townsville

Post by Point » Sun Feb 23, 2014 11:15 pm

I've come across the gearbox mount issue before too. The part books say that the later Brumbys have EA82s fitted.
90 Brumby - Stalled EJ project
98 Forester GX
02 Forester XS Luxury

User avatar
El_Freddo
Master Member
Posts: 12502
Joined: Tue Oct 04, 2005 10:00 am
Location: Bridgewater Vic
Contact:

Post by El_Freddo » Mon Feb 24, 2014 5:13 pm

Interesting fellas, thanks for the heads up. I'm going to pull these mounts out and take them to my parts joint to compare pics. If they're EA82 unit (fingers crossed!) I should have a good set at M&D's to use. Otherwise my wallet is going to take a beating I think :(

Cheers

Bennie
"The lounge room is not a workshop..."
Image
El Freddo's Pics - El_Freddo's youtube

User avatar
El_Freddo
Master Member
Posts: 12502
Joined: Tue Oct 04, 2005 10:00 am
Location: Bridgewater Vic
Contact:

Post by El_Freddo » Wed Mar 12, 2014 11:39 pm

Well, a lot has happened in the last two weeks!

Brrruuummmbbbeee lined up an MY touring wagon wreck - the gearbox mounts were much better on this one so they're now on the gearbox in Redback - I found out they fit better if you remember which way up the gearbox mounting plate goes! The payment and trailer hire to pick up this wagon was cheaper than buying two new mounts! Hopefully they'll get me through a RWC.

Last week after work I got the Brumby to this stage after a few nights:

Image

^ To get the rear drive shafts off I had to resort to a slide hammer to overcome the built up sand and rust on the stub axles.

The bearings were removed last Monday morning before the pic was taken. I'd picked up a number of parts from my local parts joint near M&D's - saved me a good hundred buying through them! This is what I started with:

Image

New shocks are actually from fleabay - ultima units. The other bits include an air filter, oil filter, rear bearings, rear slave cylinders and front ball joints. I got all but the ball joints and air filter on...

Here's the driver's rear end sorted:

Image

Ruby Scoo's "old" rear diff went back in rather than replacing seals on the one that came with Redback - it was a time and effort decision. I also tried winding up the torsion bar but it's hit a point of friction and probably only wound up the little bar about a quarter inch. Dunno where to go from here.

I also adjusted the tappets - still gotta have another go at this to get it right on this side. While I had the rocker cover off I snapped this pic for Paul's interest:

Image

Image

The above pics show the oversized "grub screw" plug in place of the welch plugs. I hope these images explain what's been done.

Once I had everything back together I gave Redback a *very* small drive down then back up the driveway. This is how it sits now, with the rims and tyres for the RWC - then it ran out of fuel:

Image

I did an oil change with some clean used oil with a new filter to help further flush out any crap left from the water in the block.

Next up will be to swap out the water pump for one from Tweety to see if it's a better unit, sort out the front rhs guard with an un-damaged one, and remove that bent chrome bar. Note to others from the previous owner - don't tow from this bar, it's decoration, not a towing point!

Really looking forward to getting this on the road soon!

Cheers

Bennie
"The lounge room is not a workshop..."
Image
El Freddo's Pics - El_Freddo's youtube

User avatar
Bumpty
General Member
Posts: 1288
Joined: Fri Aug 24, 2007 11:44 pm
Location: Tas

Post by Bumpty » Thu Mar 13, 2014 8:26 am

That is looking real schmick El Freddo!


...a little jealous, I want it haha

User avatar
El_Freddo
Master Member
Posts: 12502
Joined: Tue Oct 04, 2005 10:00 am
Location: Bridgewater Vic
Contact:

Post by El_Freddo » Fri Mar 14, 2014 7:38 pm

Bumpty wrote:That is looking real schmick El Freddo!


...a little jealous, I want it haha
Thanks mate - that's it's good side :p The front right hand guard is damaged and has a cut through the top of it - I don't think that would pass roadworthy :(

Other than that it's not a bad unit - still some work in it and a respray at some stage will make it schmick unit.

It runs heaps better on fresh fuel too - starts loads quicker/easier!

Cheers

Bennie
"The lounge room is not a workshop..."
Image
El Freddo's Pics - El_Freddo's youtube

User avatar
Proton mouse
Junior Member
Posts: 378
Joined: Mon Nov 06, 2006 11:35 pm
Location: Diagonally parked in a parallel universe

Post by Proton mouse » Fri Mar 14, 2014 9:54 pm

I like the look of the red with black wheels, very sexy.
So jealous of the Targa top too!!

User avatar
1983wagon
Junior Member
Posts: 147
Joined: Thu Jul 18, 2013 10:05 pm
Location: South Australia

Post by 1983wagon » Sat Mar 15, 2014 9:40 am

yepp wish i had a targa top. so glad we dont have road worthys here in sa, most of my previous cars would never have seen the road. Looking good bennie. Get that gaurd sorted and that brumby will be schmick.
[SIGPIC][/SIGPIC]

User avatar
brumbyrunner
General Member
Posts: 1743
Joined: Mon Apr 10, 2006 10:00 am
Location: SEQ

Post by brumbyrunner » Sun Mar 16, 2014 8:25 am

El_Freddo wrote:I also tried winding up the torsion bar but it's hit a point of friction and probably only wound up the little bar about a quarter inch. Dunno where to go from here.
If you unscrew the adjusting bolt out of the adjuster you might find the threads are just dirty. Clean them up on a wire wheel and give them a coat of anti-sieze.
Settlement Creek Racing

User avatar
El_Freddo
Master Member
Posts: 12502
Joined: Tue Oct 04, 2005 10:00 am
Location: Bridgewater Vic
Contact:

Post by El_Freddo » Sun Mar 16, 2014 10:19 am

brumbyrunner wrote:If you unscrew the adjusting bolt out of the adjuster you might find the threads are just dirty. Clean them up on a wire wheel and give them a coat of anti-sieze.
Thanks BR. I wire wheeled the bolt, but I didn't have any anti-sieze so I've used some graphite grease.

I also had the vehicle up on jack stands when I did it - would this make a difference?

Cheers

Bennie
"The lounge room is not a workshop..."
Image
El Freddo's Pics - El_Freddo's youtube

User avatar
brumbyrunner
General Member
Posts: 1743
Joined: Mon Apr 10, 2006 10:00 am
Location: SEQ

Post by brumbyrunner » Sun Mar 16, 2014 9:01 pm

It would only make it easier.

Sounds like you might have to clean out the torsion housing if you want more adjustment.

Just make sure you're not maxed out on the adjuster first or it won't help...
Settlement Creek Racing

User avatar
El_Freddo
Master Member
Posts: 12502
Joined: Tue Oct 04, 2005 10:00 am
Location: Bridgewater Vic
Contact:

Post by El_Freddo » Mon Mar 17, 2014 6:06 pm

brumbyrunner wrote:It would only make it easier.

Sounds like you might have to clean out the torsion housing if you want more adjustment.

Just make sure you're not maxed out on the adjuster first or it won't help...
How do you clean out the torsion housing? I did chip out a heap of mud in there.

I can still see a good inch of the adjuster bolt. On Sunnie the Brumby I remember winding the bolt in until the adjuster hit the bolt head...

I checked the timing I did by ear - spot on TDC! Tuned it to 7deg BTDC and it really purrs now. Still got one tappet to get right, otherwise it's running really quietly now in the tappet department.

Cheers

Bennie
"The lounge room is not a workshop..."
Image
El Freddo's Pics - El_Freddo's youtube

User avatar
NachaLuva
General Member
Posts: 1930
Joined: Wed Aug 31, 2011 5:05 pm
Location: SE Melbourne

Post by NachaLuva » Mon Mar 17, 2014 6:29 pm

Redback is looking good! :twisted:

Will it be getting a lift for offroad work?
[SIGPIC][/SIGPIC]
Owner SubieLiftOz, lift kits for Subarus :twisted:

'97 Forester: EJ22E; 4" Custom Body Lift; JDM STi plated LSD; 20mm WRX RSB; Snorkel; Kings

User avatar
El_Freddo
Master Member
Posts: 12502
Joined: Tue Oct 04, 2005 10:00 am
Location: Bridgewater Vic
Contact:

Post by El_Freddo » Mon Mar 17, 2014 6:39 pm

NachaLuva wrote:Will it be getting a lift for offroad work?
That's what Ruby Scoo's for. I got this on the previso that it's a relatively stock daily runner - no engineering issues.

But I'm super keen to get the EA82 MPFI adapted to it :rolleyes: And with the black rims it doesn't look like the same brumby I purchased :twisted:

Cheers

Bennie

PS - when I say EA82 MPFI adapted to it I mean to the EA81, not dropping an EA82 in a brumby, that's a backwards step IMO
"The lounge room is not a workshop..."
Image
El Freddo's Pics - El_Freddo's youtube

Post Reply

Return to “El Freddo”