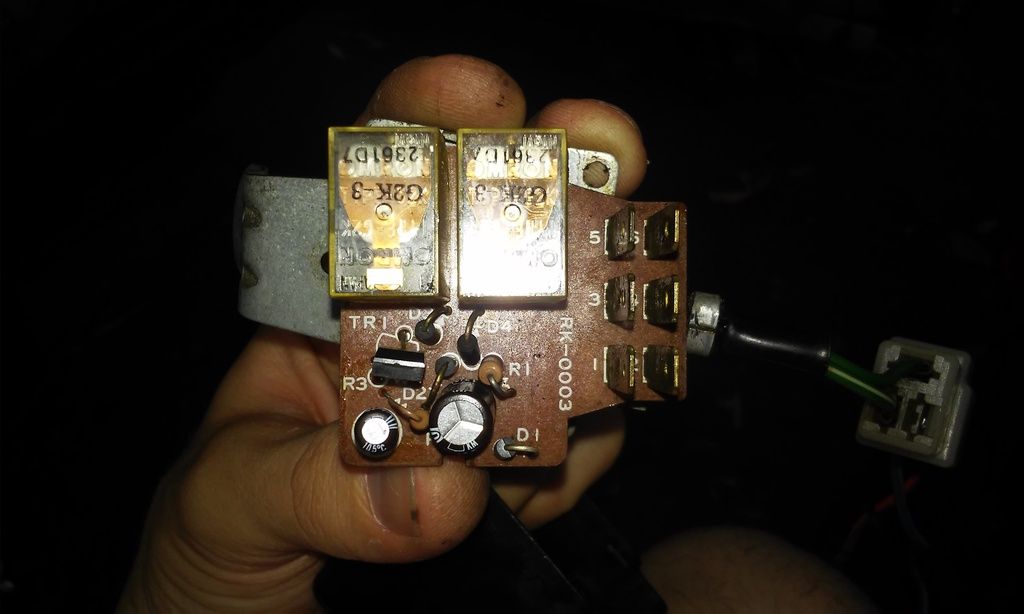
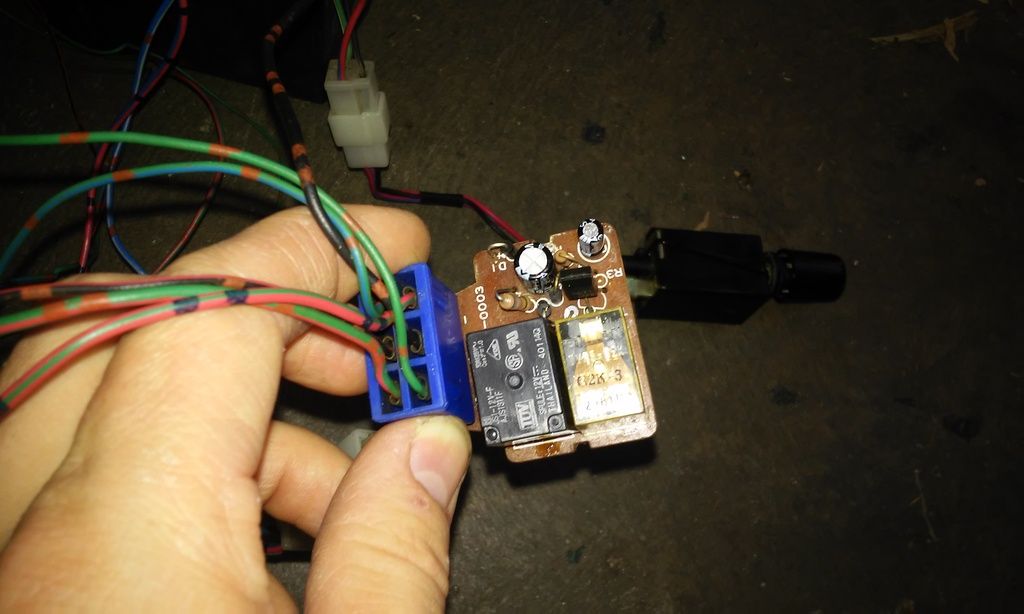
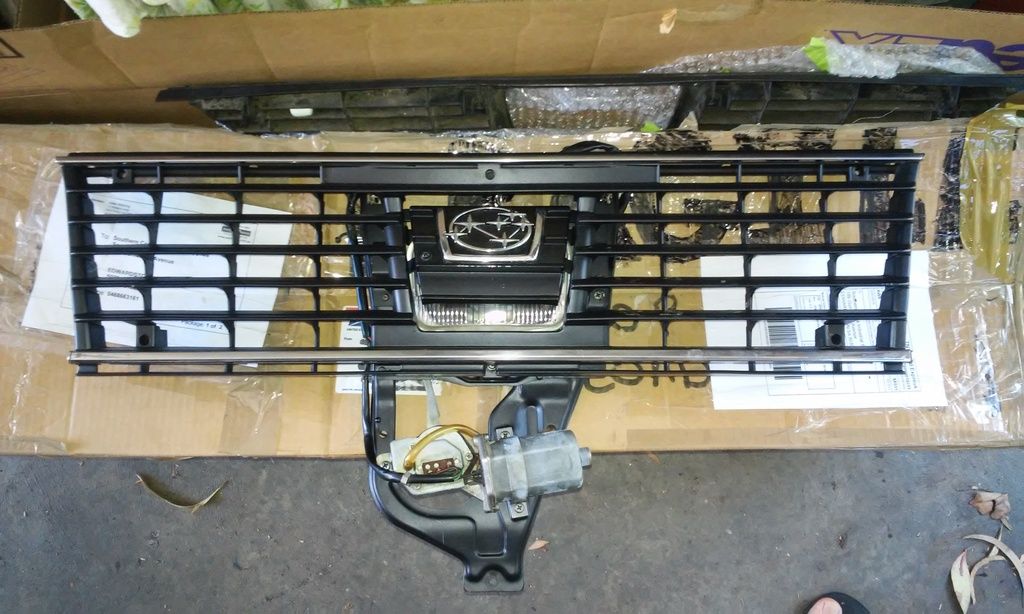
Can anyone guess what this is?
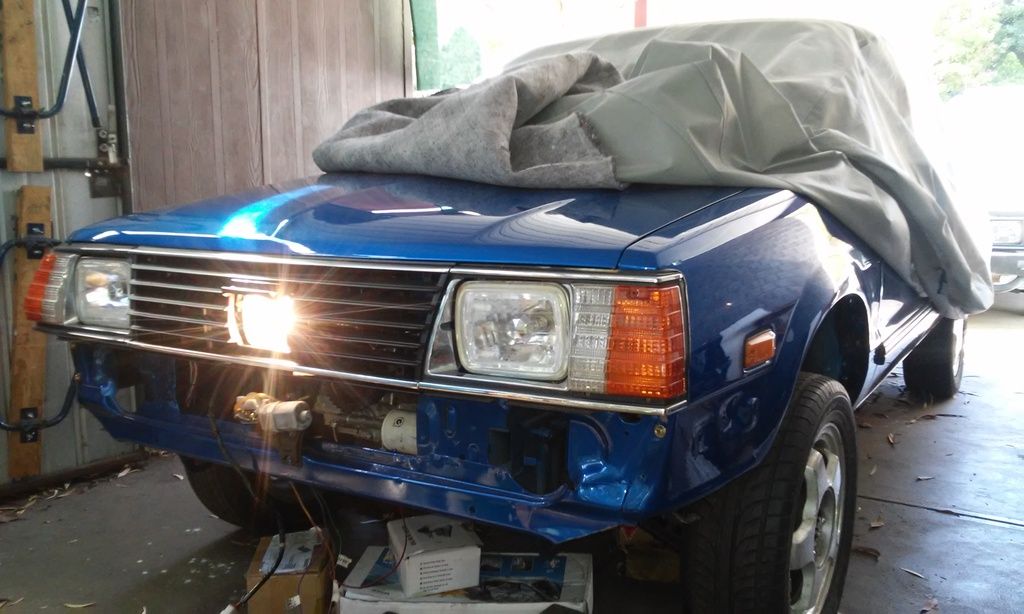
That rad support is in the way, I guess for cars with the center light optioned (US and JDM cars) the center rad support was omitted.
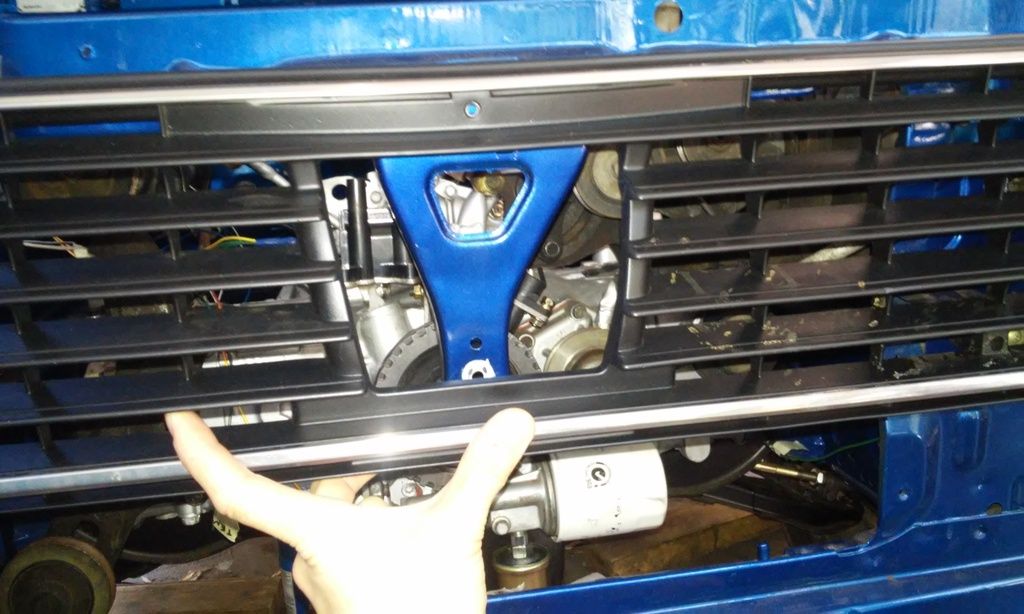
It unbolts at the bottom, but the top needs to be cut with a grinder. Amazingly, the 4 holes up top needed to mount this thing already exist in my front panel, and they are already the perfect size for my favorite - M6 rivnuts
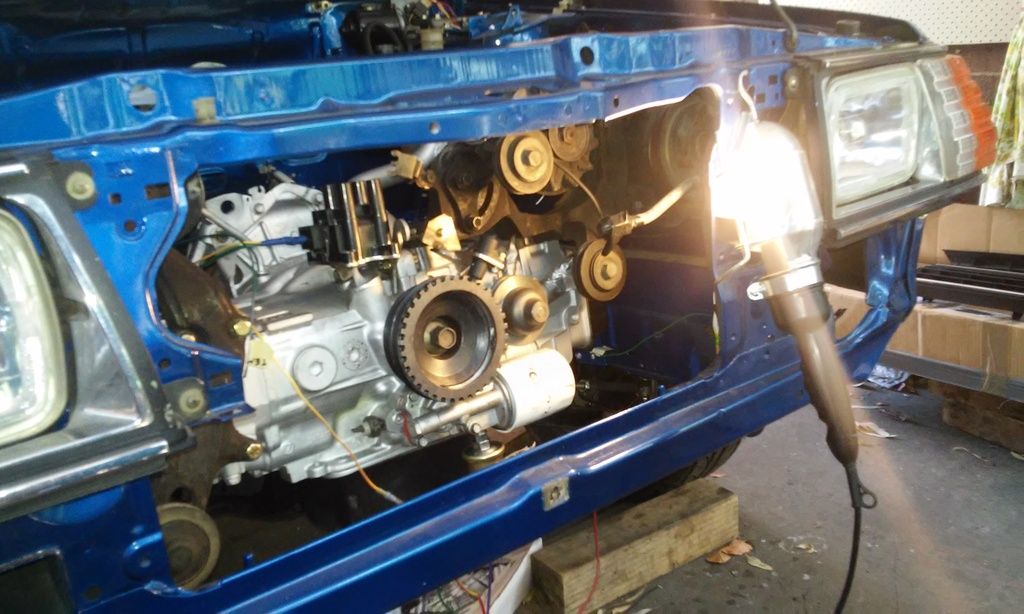
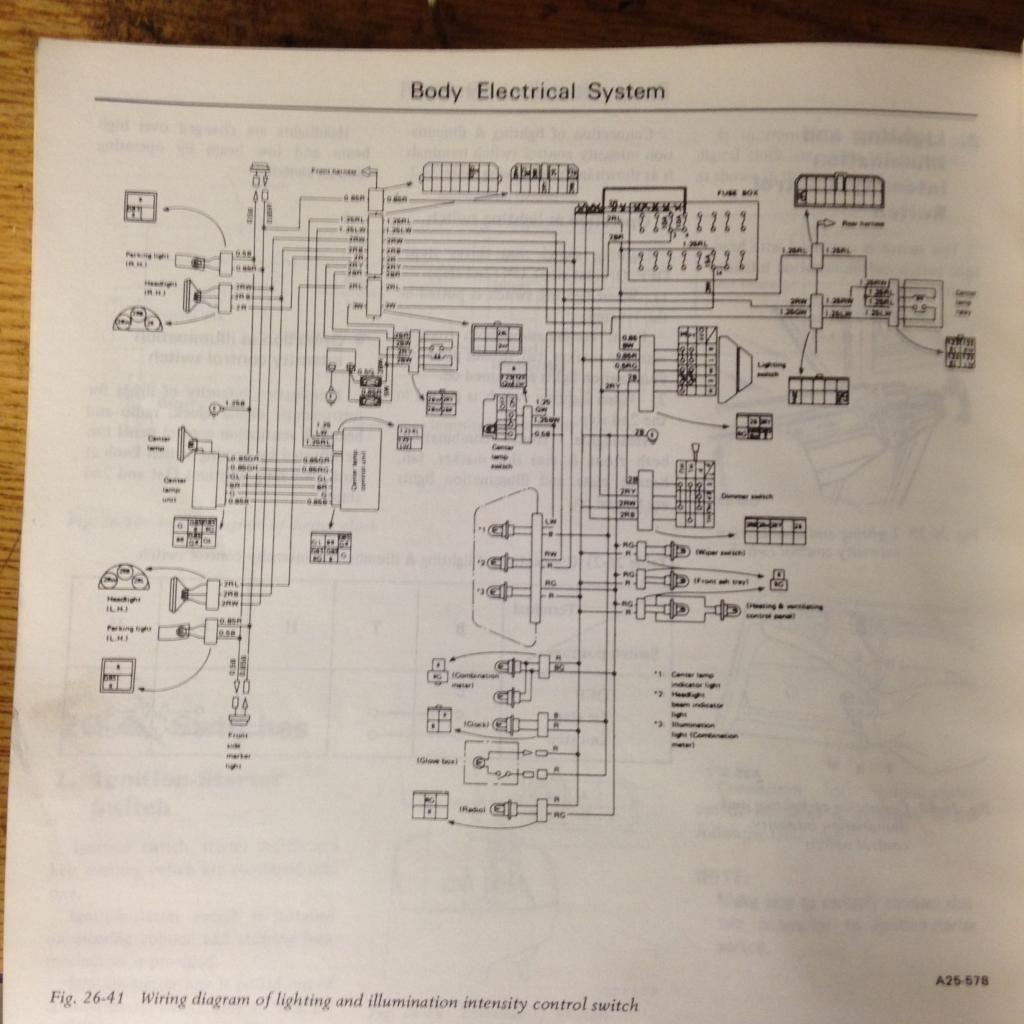
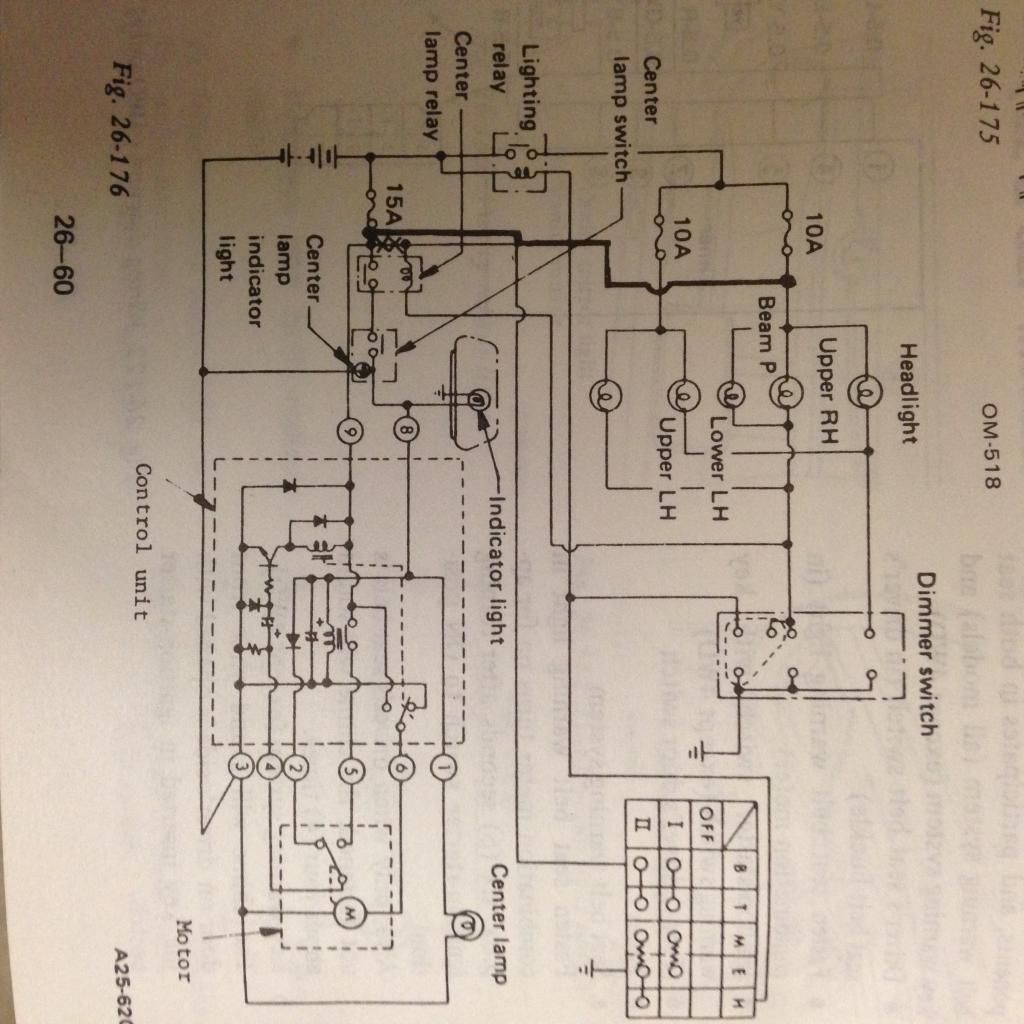
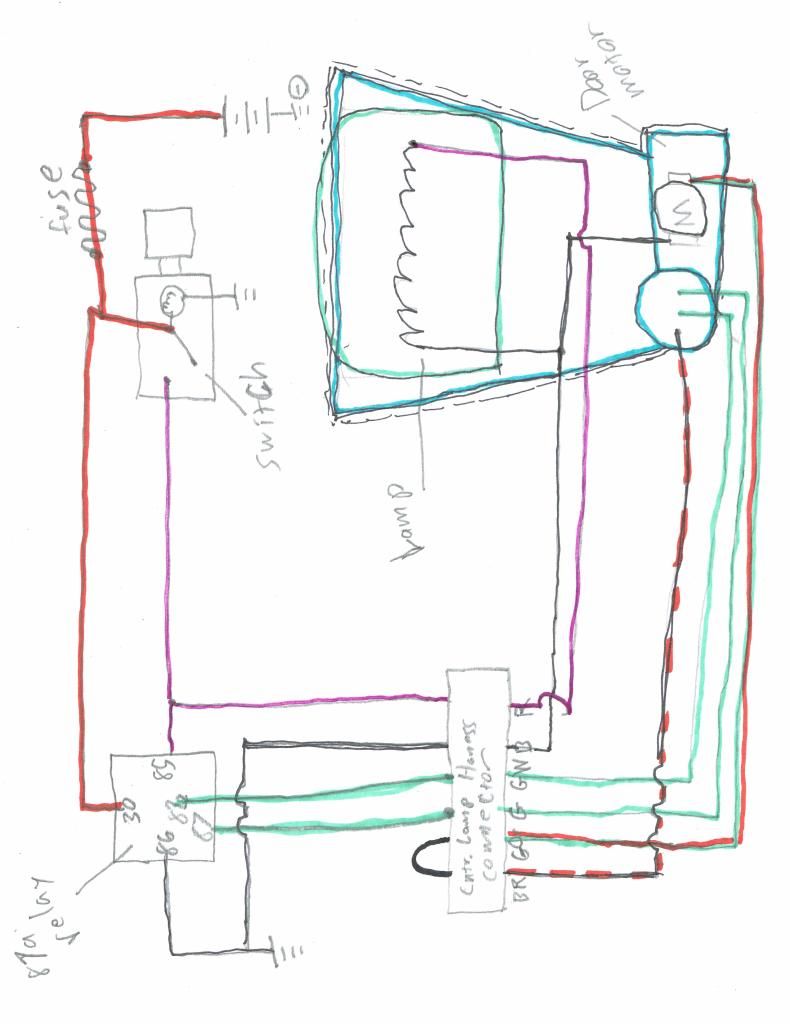
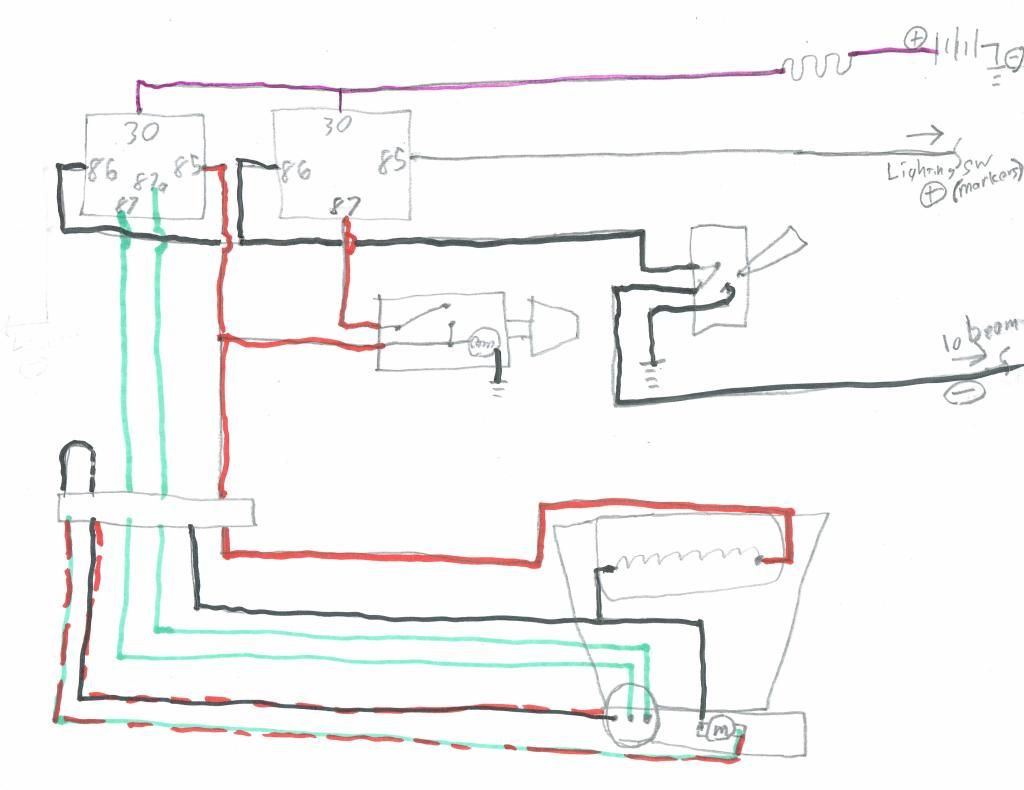
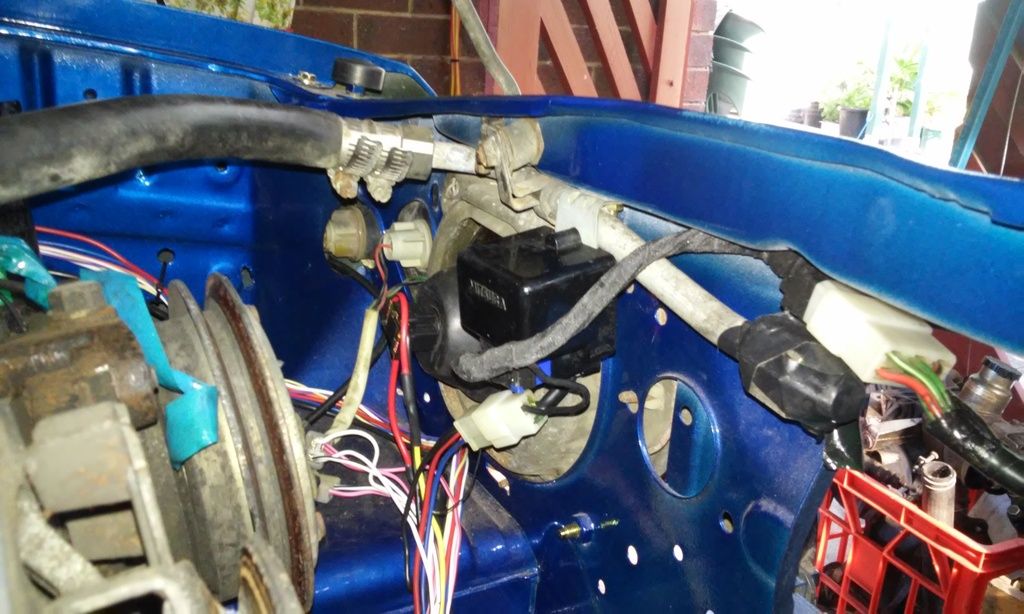
Mounted up a treat, looks the bomb. Now I just need to work out the wiring side of things!