
Good news for your engine I guess Benny, but that is unfortunate you feel like that hahaEl_Freddo wrote:Sounds like a smart move on the H6 replacement engine. I'm considering the same for mine (EJ though) but I have a stupid sentimental attachment to it

Venom: H6 Gen2 Liberty GX

Thanks BennieEl_Freddo wrote:Sounds like a smart move on the H6 replacement engine. I'm considering the same for mine (EJ though
I like the air box - snorkel next?Can you get a factory pipe from the airbox to the throttle body, that IMO will really set off the factory look!
Keep up the good work mate!
Cheers
Bennie
Bennie you have some strange sentimentality at times
[SIGPIC][/SIGPIC]
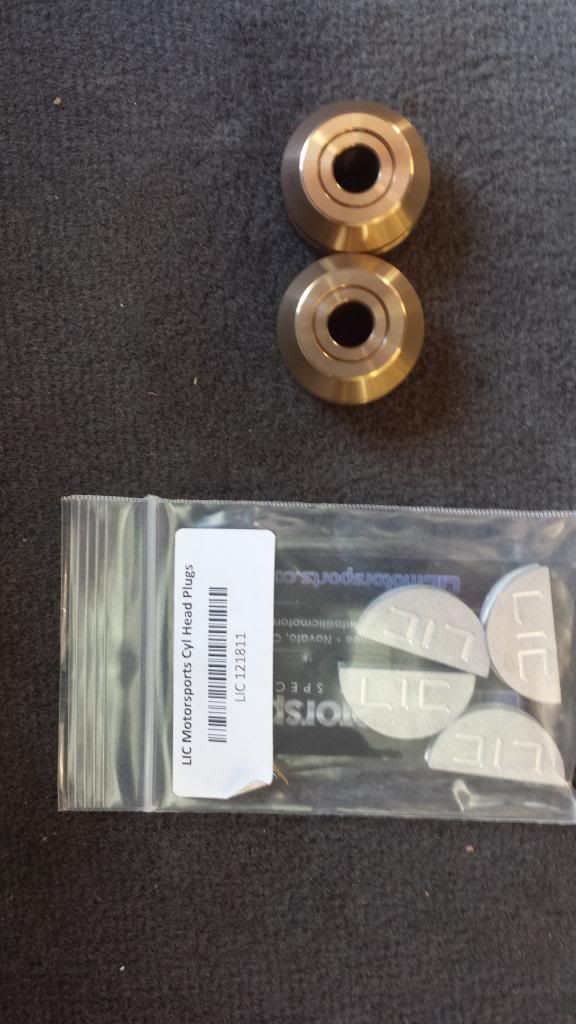
Always exciting when parts are in the mail! Waiting on a full H6 gasket kit (genuine!) and genuine thermostat, LIC aluminum half-moon plugs, solid center prop shaft mounts, Exedy HD clutch kit, new set of Iridium spark plugs (farkin expensive!!!!), gold brushed GTB dash and trim inserts, zerospors front grill (kinda ugly but we'll see), Tein front bonnet damper kit.
Found a bloke to fabricate a new radiator for me. After looking over my car he was telling me that in many engine conversions the biggest problem for cooling is the lack of space between the motor and radiator. The lack of space prevents airflow as high air pressure forms between the motor and radiator. Bigger radiator and bigger fans only contribute to worsening the problem. So the plan is to relocate the condenser in front of the bonnet latch support bar. He'll then build me a radiator to fit where the condenser currently sits. This should give mean extra 2 or 3" to play with! He's also fabbing up a full alluminium shroud to house 2 12" Spal fans. The cores this guy sources are all 1-off hand made and he uses them to cool 1000hp+ turbo and twin turbo V8's, so it should be ample for a stock little H6.
Overall this will give me more space behind the radaitor (=better flow), thicker 26mm core which will also be more efficient than stock, space for the lower radiator house which currently fouls on the motor, upgrade from 1 fan and a half shroud to the full monty shroud and twin fans.
[SIGPIC][/SIGPIC]
-
RSR 555

- Elder Member
- Posts: 6951
- Joined: Sat Nov 10, 2007 10:42 am
- Location: ATM... stuck in Rockingham
Yeah.. should be able to withstand the H6 awesomeness 
Gotta love when prezzies arrive Can't wait to see the engine build 
Gotta love when prezzies arrive
You know you are getting old when the candles on your birthday cake start to cost more than the cake itself.
RSR Performance
Home of the 'MURTAYA' in Oz
Subaru Impreza WRX based Sportscar
[SIGPIC][/SIGPIC]
Disclaimer: Not my website but hyperlink here to Subaru workshop manuals
RSR Performance
Home of the 'MURTAYA' in Oz
Subaru Impreza WRX based Sportscar
[SIGPIC][/SIGPIC]
Disclaimer: Not my website but hyperlink here to Subaru workshop manuals

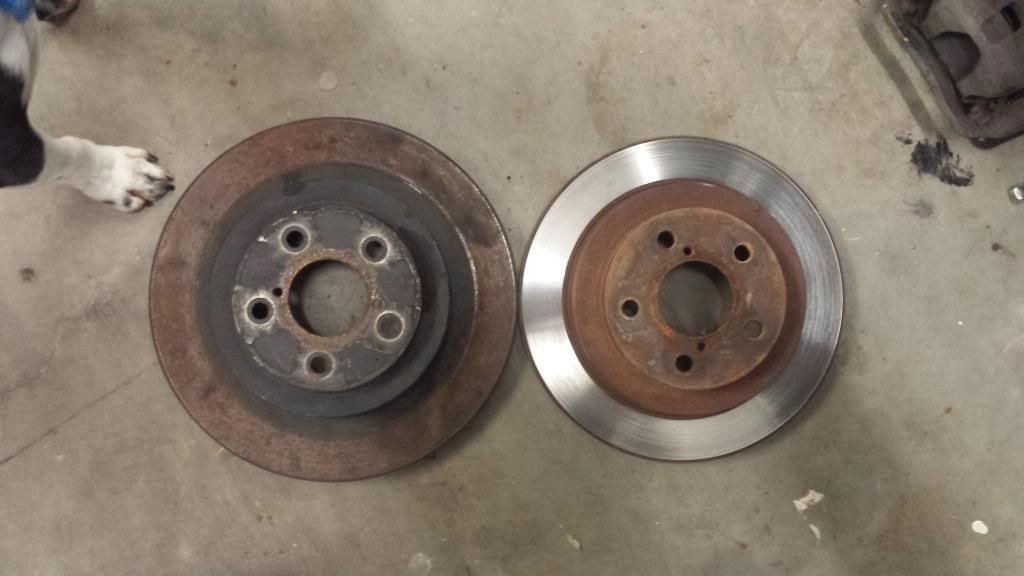
Picked up a set of H6 rear brakes from PAP, but didn't realise they were actually bigger.
Comparing the rotors.
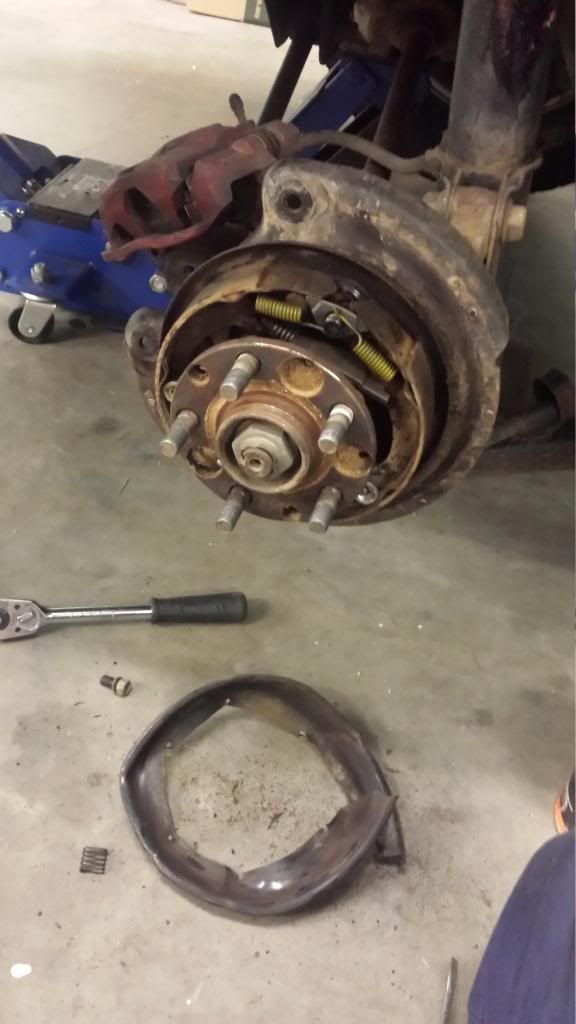
The dust shield on the backing plate was too small so i ripped it off.
Bigger is better
H6 rotors and calipers fitted up on the RH side.
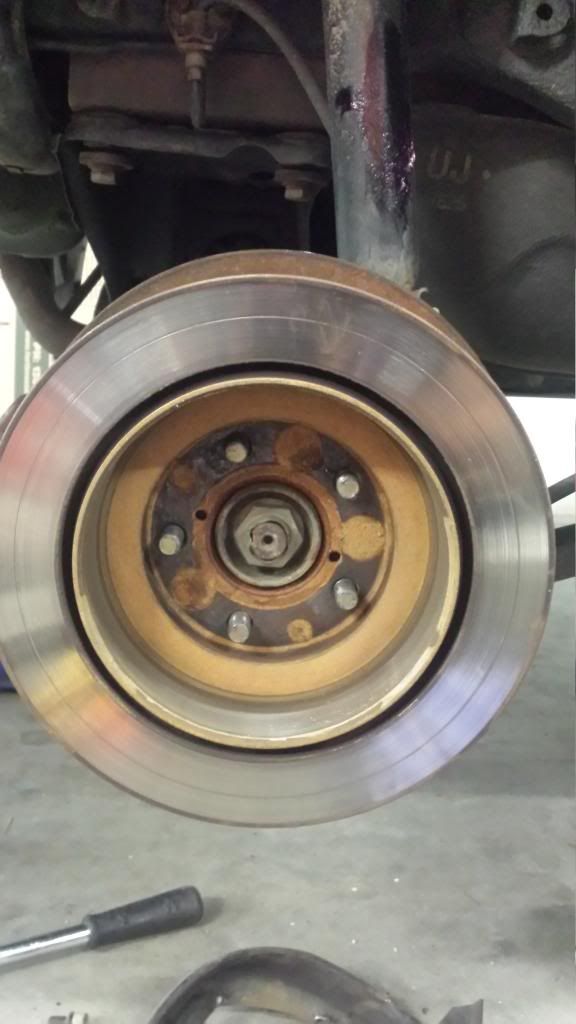
LH side
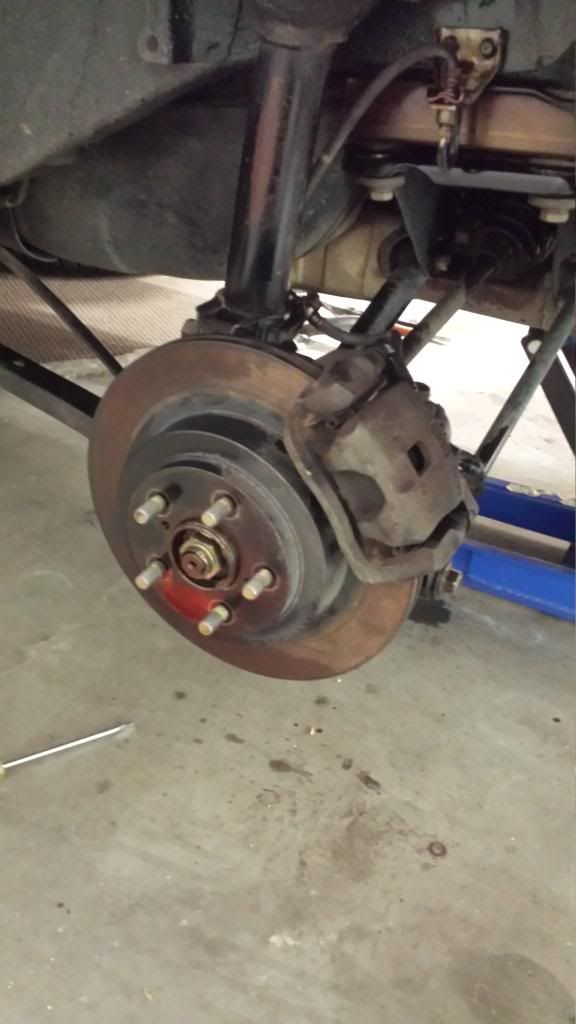
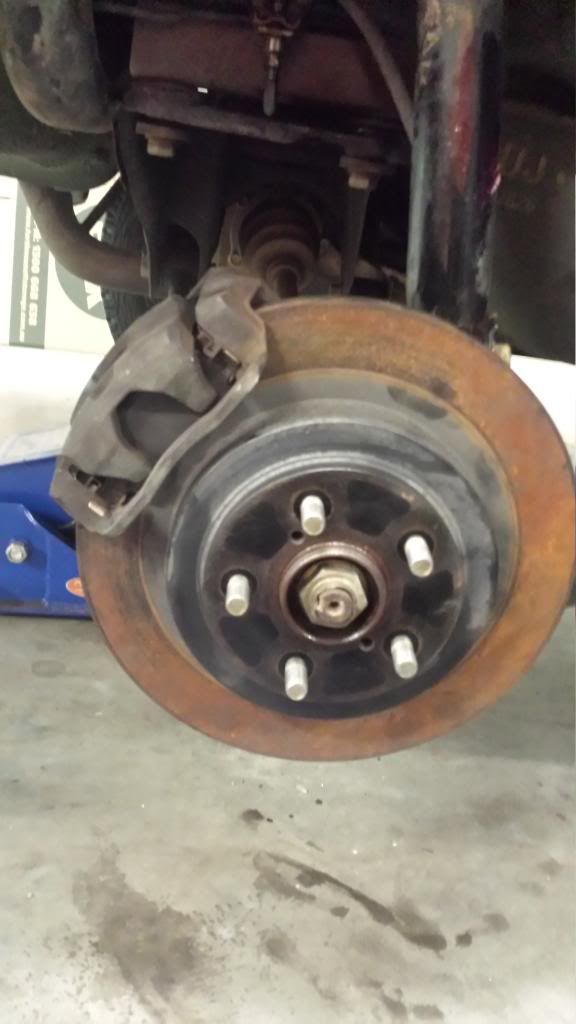
Pretty happy with the results. Also have some plans for a slight brake upgrade upfront as well, Landcruiser front pads fit into the Suby 4 pot caliper but have a bigger pad area. However engine first.
Comparing the rotors.
The dust shield on the backing plate was too small so i ripped it off.
Bigger is better
H6 rotors and calipers fitted up on the RH side.
LH side
Pretty happy with the results. Also have some plans for a slight brake upgrade upfront as well, Landcruiser front pads fit into the Suby 4 pot caliper but have a bigger pad area. However engine first.
[SIGPIC][/SIGPIC]
-
RSR 555
- Elder Member
- Posts: 6951
- Joined: Sat Nov 10, 2007 10:42 am
- Location: ATM... stuck in Rockingham
I did kinda the same to my rears on my 98 Outback. I used B4 Liberty brakes and found the backing plate interfered but I just push the backing plate back towards the inside of the car.. still looks odd if you point it out but a quick glance (like the licence guys will do) and all looks sweet
That's good info on the 4 spot caliper pads
That's good info on the 4 spot caliper pads
You know you are getting old when the candles on your birthday cake start to cost more than the cake itself.
RSR Performance
Home of the 'MURTAYA' in Oz
Subaru Impreza WRX based Sportscar
[SIGPIC][/SIGPIC]
Disclaimer: Not my website but hyperlink here to Subaru workshop manuals
RSR Performance
Home of the 'MURTAYA' in Oz
Subaru Impreza WRX based Sportscar
[SIGPIC][/SIGPIC]
Disclaimer: Not my website but hyperlink here to Subaru workshop manuals
-
El_Freddo

- Master Member
- Posts: 12704
- Joined: Tue Oct 04, 2005 10:00 am
- Location: Bridgewater Vic
- Contact:
Yeah I know. But this engine has served me very well, I know where it's been and what it's been subjected to. I also think it's a good base to begin with...Venom wrote:Bennie you have some strange sentimentality at timesI personally have very little even for my car. My vested interest is mainly that it serves my varied needs extremely well and is virtually irreplaceable. As far as individual parts? Whatever is the most efficient way to go when on limited time and funds.
Bit odd about those rear brakes - but good to see you've got another brake upgrade! Interesting about the interchangeable parts with the pads - more of this should have been occurring a long time ago!
Cheers
Bennie

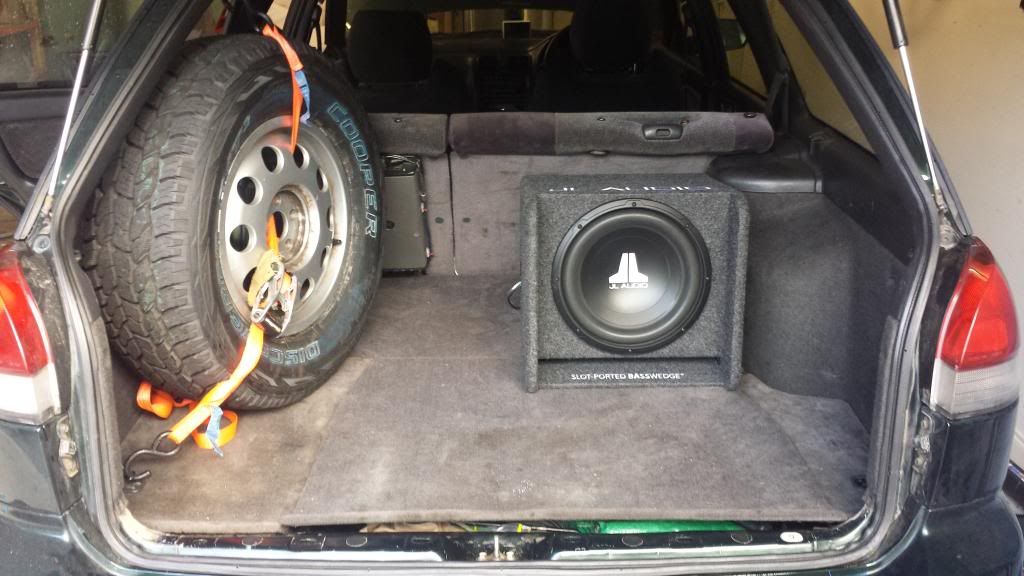
So my spare tyre doesn't fit in the wheel well now its a 225/70R15. Even bolted firmly down it's just too fat. So I threw all my recovery gear in the wheel well included my hand winch.
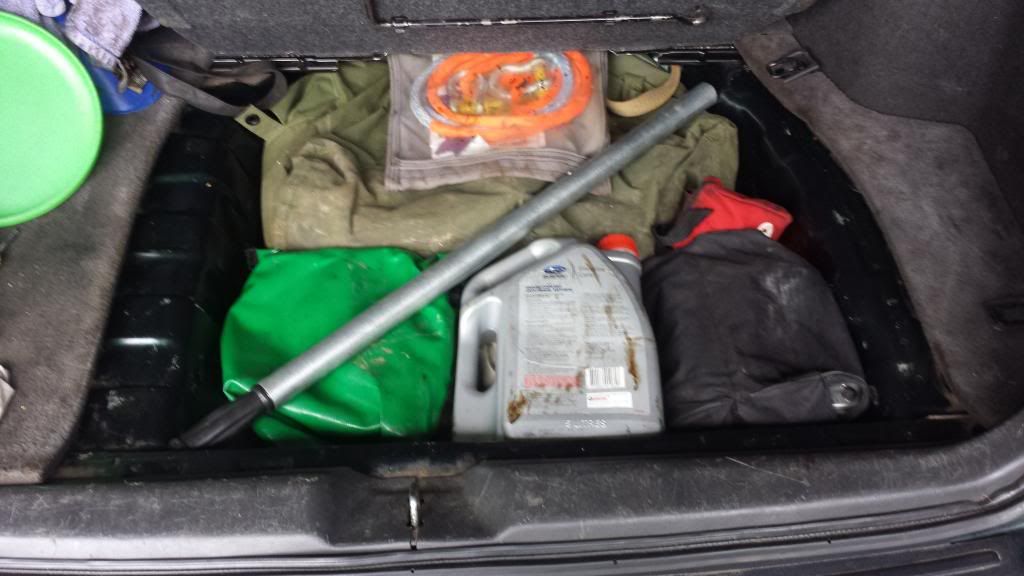
Then I remembered I had some d-shackle mounting brackets so I figured I may as well use them.
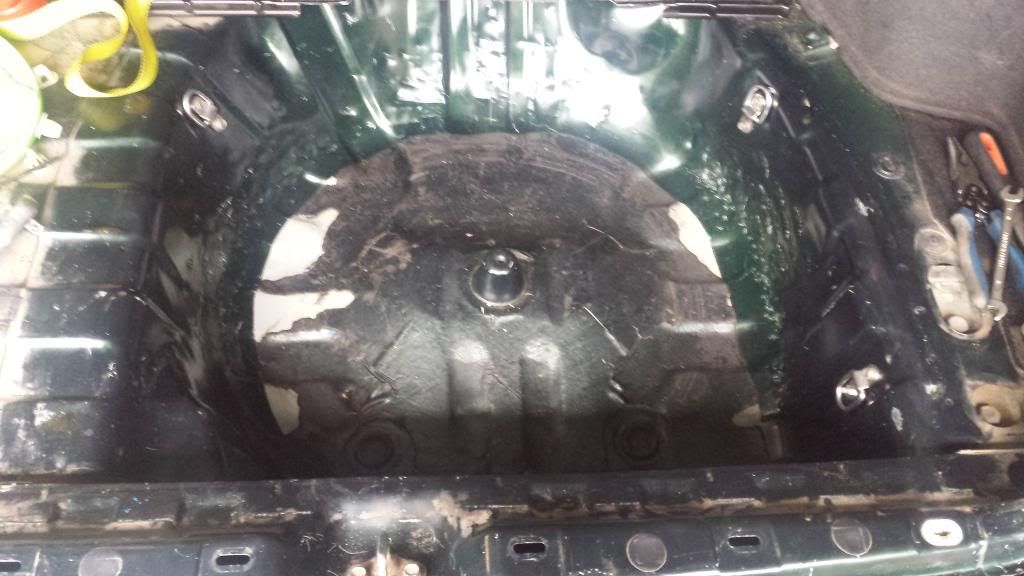
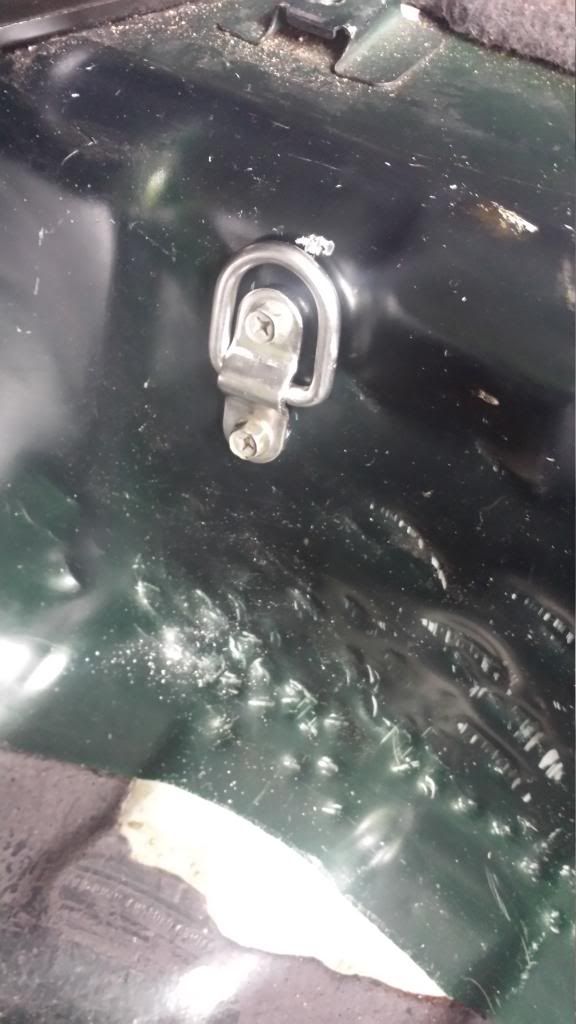
Pretty neat I think. 4 would have been better but I only had 3 so I had to make do.
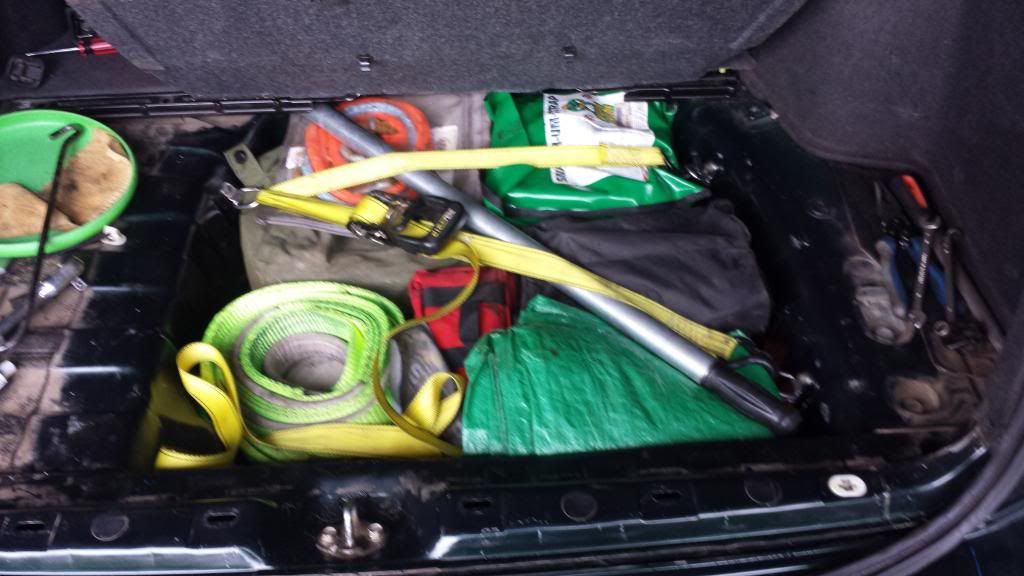
Then I adapted a baby-seat restraint to one of the cargo barrier mounts so i could secure my spare tyre off to one side. That gave me enough room to move my new sub in the back and off the back seat.
The trim in the rear needs to be replaced so I've just left it out for now.
Also have a rear step-panel thingy to put on after I spent the morning peeling off the double-sided tape from it.
Then I remembered I had some d-shackle mounting brackets so I figured I may as well use them.
Pretty neat I think. 4 would have been better but I only had 3 so I had to make do.
Then I adapted a baby-seat restraint to one of the cargo barrier mounts so i could secure my spare tyre off to one side. That gave me enough room to move my new sub in the back and off the back seat.
The trim in the rear needs to be replaced so I've just left it out for now.
Also have a rear step-panel thingy to put on after I spent the morning peeling off the double-sided tape from it.
[SIGPIC][/SIGPIC]

Beatrush prop/tailshaft mounts came in today, as well as the aluminium half moon plugs.
Old vs. New.
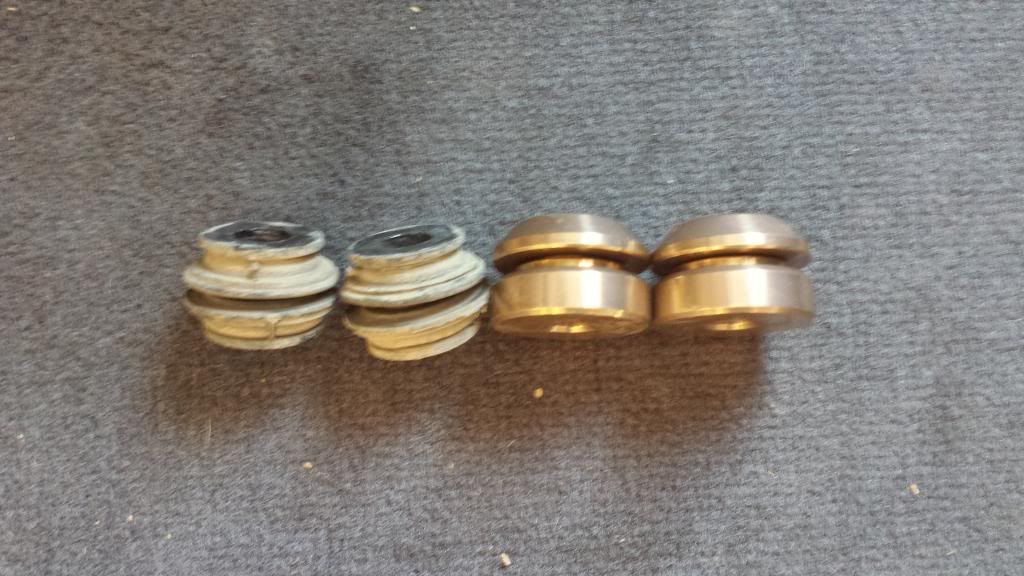
Installed
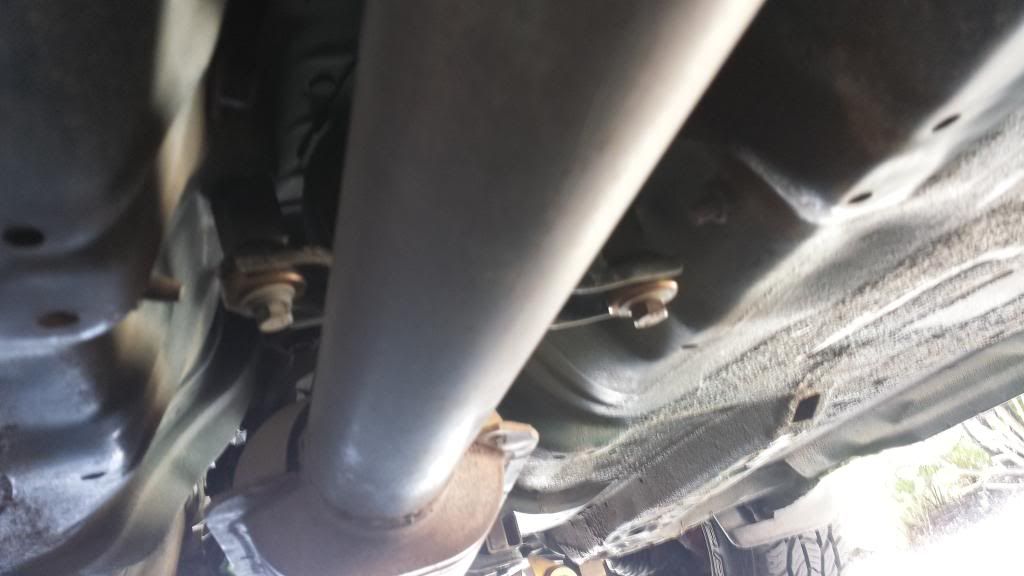
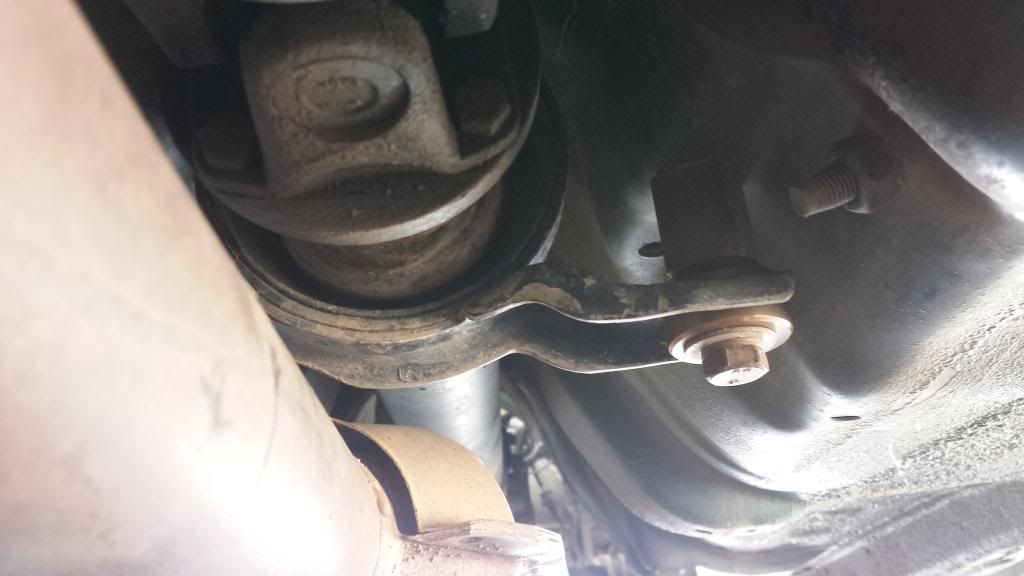
Clutching into gear feels smoother and so does the change from from on/off throttle.
Thought the prop mounts might cure the bunny hoping my car does when applying throttle at low speeds or going over a speed bump. Nothing to do with gear changes so hoping the new clutch/pressure plate cures it... this problem has been annoying me for years.
Old vs. New.
Installed
Clutching into gear feels smoother and so does the change from from on/off throttle.
Thought the prop mounts might cure the bunny hoping my car does when applying throttle at low speeds or going over a speed bump. Nothing to do with gear changes so hoping the new clutch/pressure plate cures it... this problem has been annoying me for years.
[SIGPIC][/SIGPIC]
-
Silverbullet

- Senior Member
- Posts: 2953
- Joined: Mon Aug 23, 2010 6:20 pm
- Location: Adelaide
Let me know when you get to the bottom of it, my Brum is doing the same thing really bad lately...thought maybe it's the worn out crunchy CV joints having lots of backlash in them, how old are your joints?Venom wrote:Thought the prop mounts might cure the bunny hoping my car does when applying throttle at low speeds or going over a speed bump. Nothing to do with gear changes so hoping the new clutch/pressure plate cures it... this problem has been annoying me for years.
Will it ever end!?
-EA81 TWIN CARB!!!!
-L series 5 speed
-Custom paint job
-2" lift
-Full custom re-wire
-L series front end

-EA81 TWIN CARB!!!!
-L series 5 speed
-Custom paint job
-2" lift
-Full custom re-wire
-L series front end
I thought you had a new clutch plate plus machined the flywheel, not sure about the pressure plateVenom wrote:Next thought was it could be a heat scorched flywheel, maybe pressure plate? I do get flywheel chatter when engaging clutch. I'll tick those off when I do the motor.
[SIGPIC][/SIGPIC]
Owner SubieLiftOz, lift kits for Subarus
'97 Forester: EJ22E; 4" Custom Body Lift; JDM STi plated LSD; 20mm WRX RSB; Snorkel; Kings
Owner SubieLiftOz, lift kits for Subarus
'97 Forester: EJ22E; 4" Custom Body Lift; JDM STi plated LSD; 20mm WRX RSB; Snorkel; Kings
Take this thing...
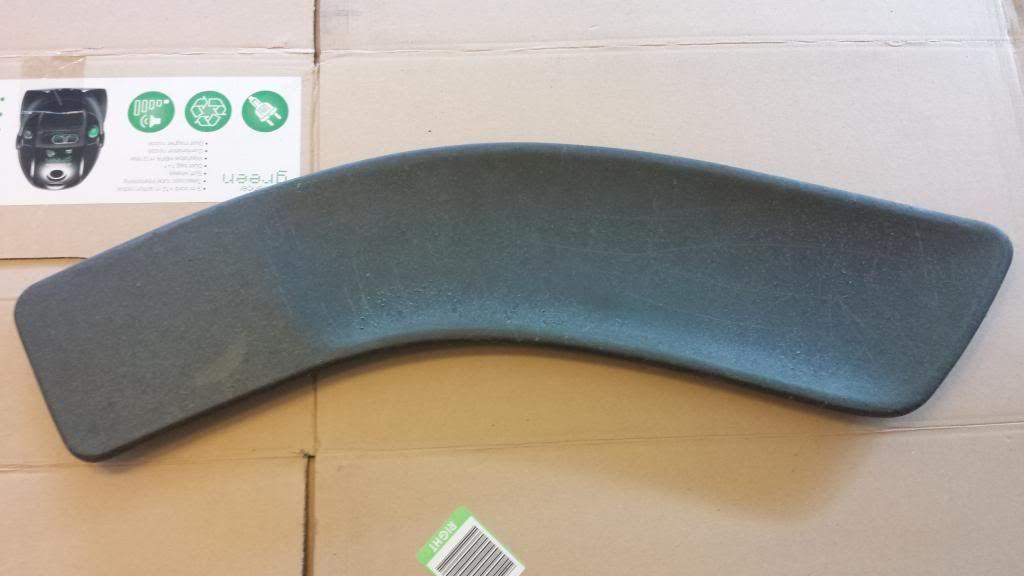
Glue some of this on...
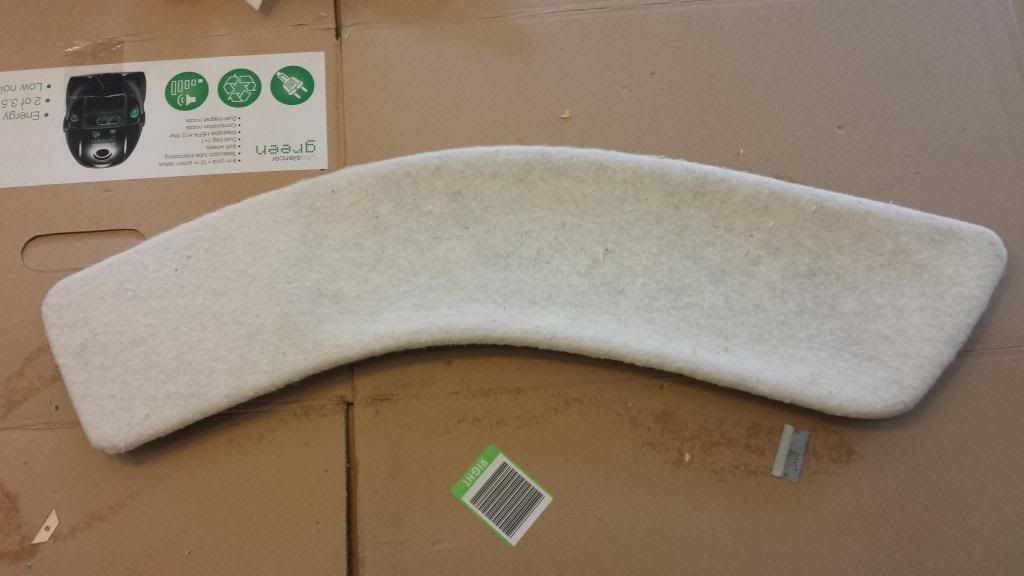
Then glue some of this on....

Old door panel...
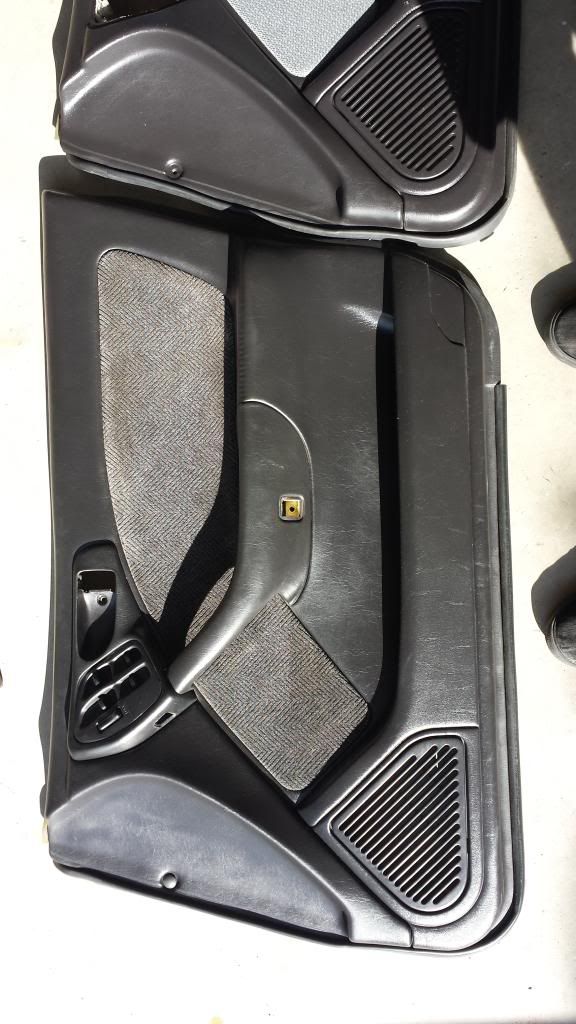
Better door panel with retrimmed insert
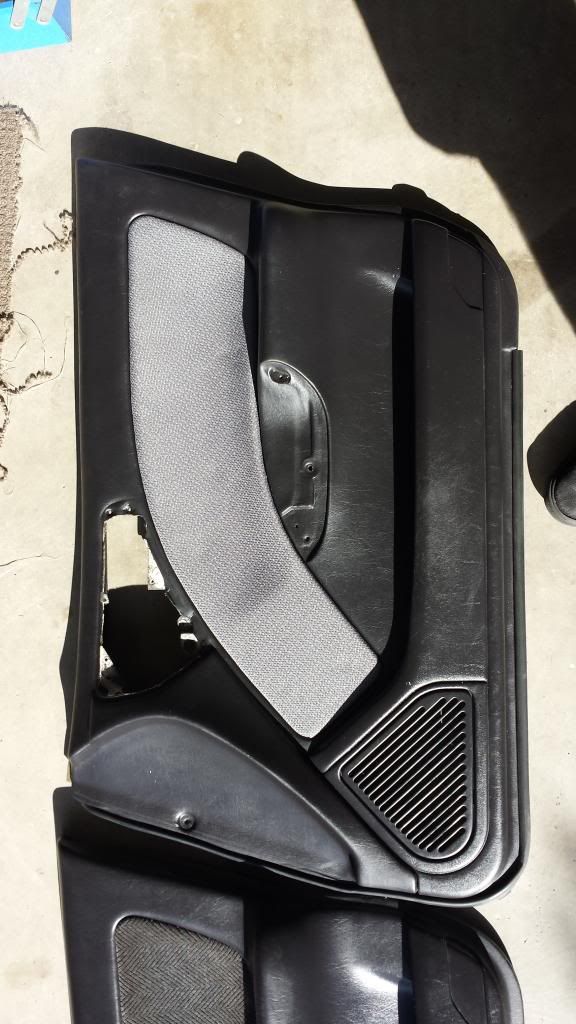
Installed
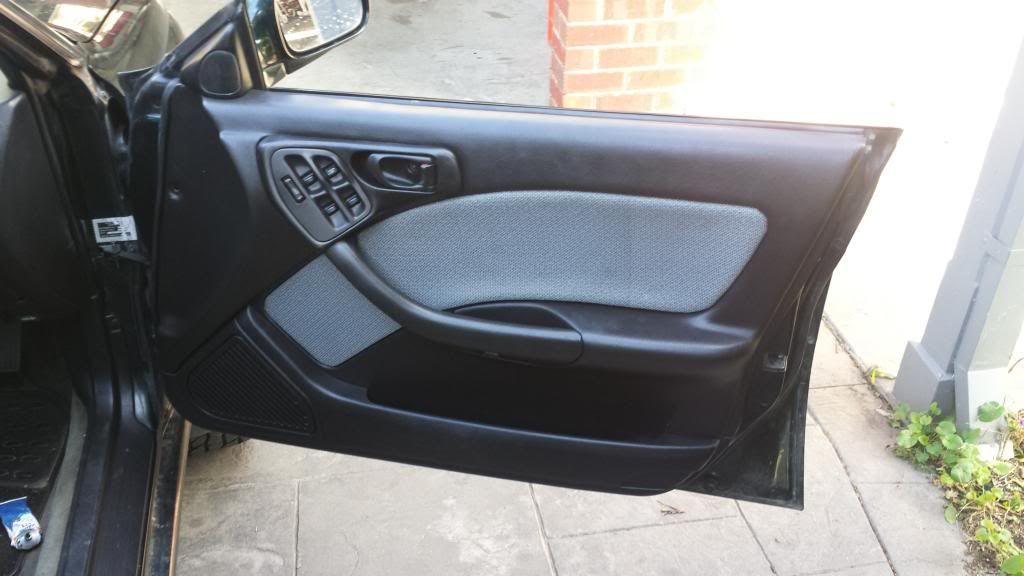
Pretty big difference.
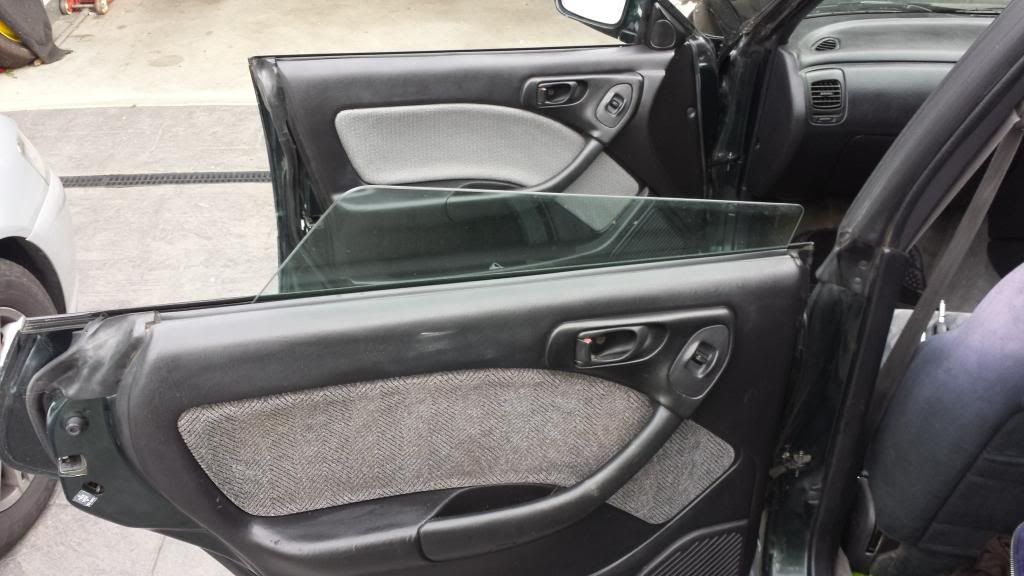
My old door panels were almost worn completely through so the new (s/h) ones have made a difference. The new insert looks neat too! Just need to find some rear door cards in good condition to finish off the job.
Also after some different front seats, maybe Gen3 GTB if I can find them. Leather rear seats would be cool too, that way everything is black but that trim insert.
Glue some of this on...
Then glue some of this on....
Old door panel...
Better door panel with retrimmed insert
Installed
Pretty big difference.
My old door panels were almost worn completely through so the new (s/h) ones have made a difference. The new insert looks neat too! Just need to find some rear door cards in good condition to finish off the job.
Also after some different front seats, maybe Gen3 GTB if I can find them. Leather rear seats would be cool too, that way everything is black but that trim insert.
[SIGPIC][/SIGPIC]

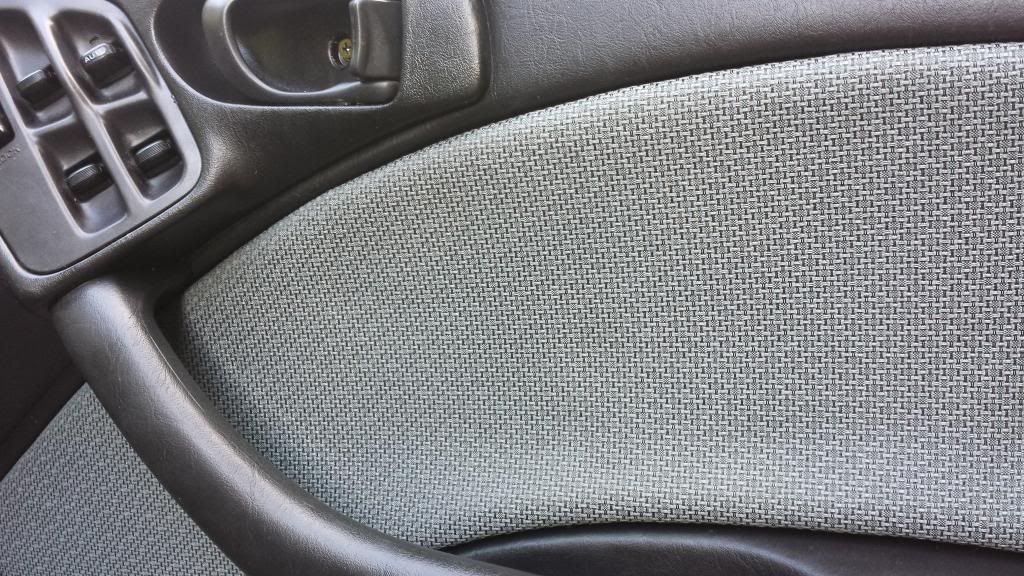
I've always thought I should do this to the L series to freshen up the interior a bit. I gather that is some kind of very thin spongy foam, then some kind of stretchy fabric? Are they specifically automotive products or did you get them from some kind of textile shop?
Just using spray-on glue?
Just using spray-on glue?
EZ30 L series - Monsterwagon
https://www.ausubaru.com.au/viewtopic.php?f=71&t=26163
https://www.ausubaru.com.au/viewtopic.php?f=71&t=26163
The padding is called wadding and my mum uses it in her quilts. She gets it from spotlight. Pretty sure its standard fabric kinda stuff. More like fabric than a foam. The fabric was also from spotlight too and nothing special. Should do the job since its not a hard wearing spot. And yeah I just used a spray on adhesive.
[SIGPIC][/SIGPIC]