let me start by saying that on MY (gen2 etc) the front strut top mount is to be mounted one way for 4WD and the other way for FWD
With 4WD the centre of the strut is more rearward in the elongated round hole in the strut tower. FWD get the bushing towards the front of the elongated hole in the tower.
Right, when you guys fit up EJ struts and strut tops when installing the x b r e a d kits or your own combinations - just where do you determine the centre line of the new strut is to go ? Forwards, more rearwards, central ? or just where ever it fits ??
I am part way through installing L Series struts and strut mount with the three studs and bearing to replace the two stud bushed strut tops and shagged MY struts. It all started because L struts won't just easily fit to MY strut tops, MY shagged, have decent L Series bits.
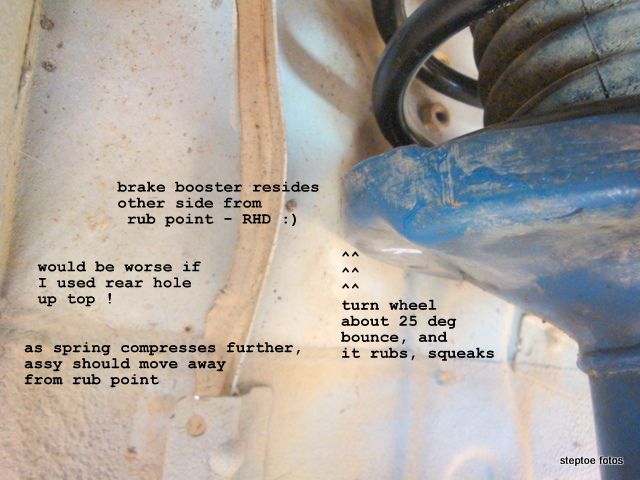
Was going to use rear most MY mounting hole and make two new holes for front pair, BUT, that ain't on, the mount is angled and needs to go the same way as an L tower - so will easier adapt to using front hole of MY. This places the bearing/mount/strut centre where FWD strut centres are supposed to be, not 4WD centres.
It might actually be better for a tarmac warrior than a track warrior
Anyone understand what I am planning on doing, just unknowing what the consequences are or either position. Just don't wanna be drilling holes all over my towers