Steering shafts/linkages/extensions

Get the most out of your ride & how to make enhancements ...
Post Reply
User avatar
El_Freddo
Master Member
Posts: 12504
Joined: Tue Oct 04, 2005 10:00 am
Location: Bridgewater Vic
Contact:

Steering shafts/linkages/extensions

Post by El_Freddo » Sun Aug 10, 2014 12:33 am

So I've been working out how to build a steering extension to replace the one that's now stuffed - the lower uni has seized up :(

I need a unit for a 3 inch lift kit, this is what I've so far found in my brain storming with the parts I currently have available:

Image

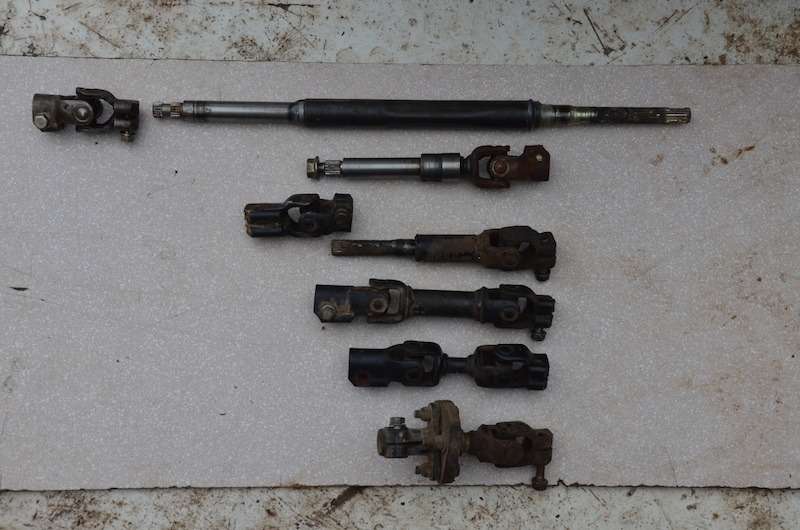
So what we have above from top to bottom:

1/ This is an L series adjustable tilt steering column and the uni joint in that tilt system

2/ Top part of an MY touring wagon tilt steering column with welded uni joint

3/ Uni joint and shaft below are the L series Manual steering setup, top uni joint is separate to the shaft unit, bottom is welded to the shaft

4/ The welded custom extension for a three inch lift - this is the unit to replace

5/ Impreza PS steering knuckles, factory welded together

6/ MY touring wagon PS knuckle and rubber disc

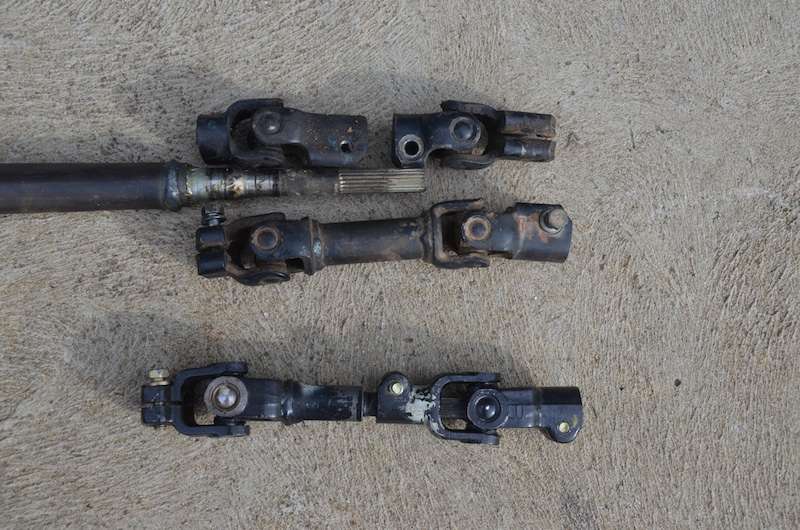
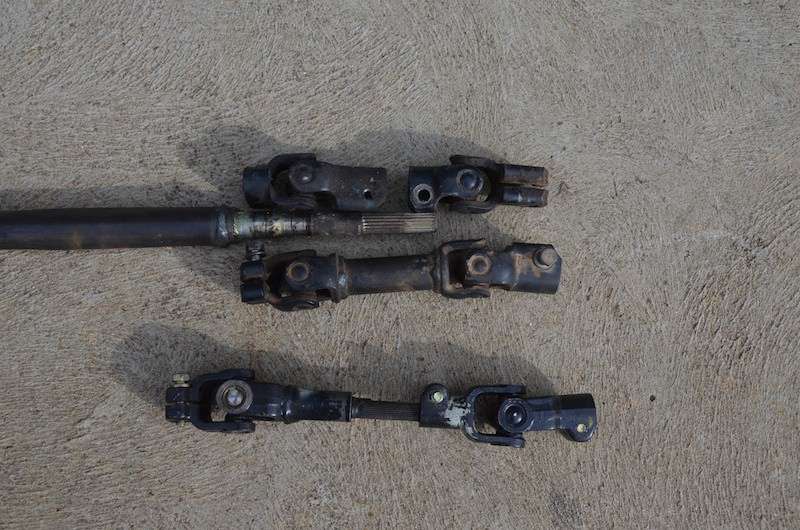
From this I've played around with two of the L series Manual independent uni joints (same as MY manual steering too ;) and the splined section on the bottom of the L series steering column to get this:

Image

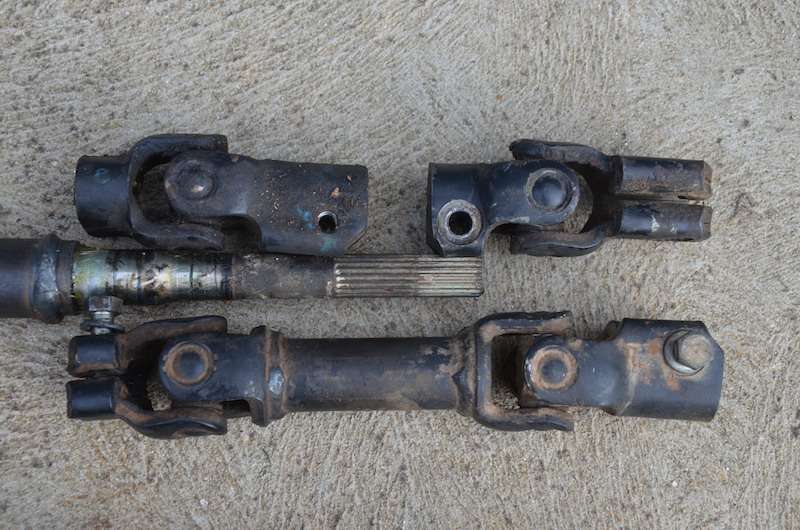
The issue is that the splined section is about 25-30mm too short for what I want to do. Need to find a solution and welding isn't an option. I'm going to look into a couple of places in town that might have the correct splined rod that could be used.

Another thought was this unit - very extendable!

Compressed (would need to cut the excess shaft to clear the uni joint):

Image

Extended:

Image

This unit came from a Toyota Tercel. The problem with this unit is that is uses a fine spline rather than the course one that Subaru uses. What this highlights is that there could be another make/model of vehicle that could fit the bill - just need to find it...

Also, the first pic, with those parts you could make a steering extension without welding that could be used in a number of large lift combinations... Got me thinking about just what can be done in that department - and possibly what the US boys do for a steering extension.

I'll update when I come up with my solution. For now, unfortunately, Ruby Scoo sits in the driveway useless :(

Cheers

Bennie
"The lounge room is not a workshop..."
Image
El Freddo's Pics - El_Freddo's youtube

User avatar
steptoe
Master Member
Posts: 11582
Joined: Thu Oct 06, 2005 10:00 am
Location: 14 miles outside Gotham City

Post by steptoe » Sun Aug 10, 2014 8:31 am

um, why not replaced the seized uni ? Hardy Spicer used to do one for the MY Brumby

part number K5-A699 U/J kit staked steering bar code 9320278022315, code 34018 from cbc bearings,

did mine years ago with success. No need to send off for balancing as it don't revolve fast enough to cause any weird oscilations :)

a new photo shoot with some dimensions might help id some junk ion others collections ?

can't see L Series PS components on parade there

User avatar
TOONGA
Elder Member
Posts: 5335
Joined: Sat May 30, 2009 10:15 am
Location: Australind closer to where they divided by zero
Contact:

Post by TOONGA » Sun Aug 10, 2014 9:37 am

I use the two long parts of an MY power steering knuckle with a 2 inch kit without the rubber block,you could do something similar and make a block to bolt between the two long bits and not have to weld anything.

I notice you don't have an outback or liberty knuckle there either.


TOONGA
Image
PJ Gone but not forgotten
JETCAR AKA the sandwedge Rusted in pieces

User avatar
Venom
General Member
Posts: 1044
Joined: Sun Feb 03, 2008 10:04 am
Location: Ballarat

Post by Venom » Sun Aug 10, 2014 7:32 pm

So basically a steering link that is adjustable in length with no welding or the need for spline machining (which as Nacha found out is just ridiculously expensive).

I thought Nacha had the right idea with the blocks in his steering extension. So essentially remove the rubber damper/spacer, replace it with a machined alloy block (preferable something that hugged the contours to essentially "lock it" in place), then bolt it all together.

Like this.
Image

Image
[SIGPIC][/SIGPIC]

User avatar
El_Freddo
Master Member
Posts: 12504
Joined: Tue Oct 04, 2005 10:00 am
Location: Bridgewater Vic
Contact:

Post by El_Freddo » Sun Aug 17, 2014 1:12 am

steptoe wrote:um, why not replaced the seized uni ? Hardy Spicer used to do one for the MY Brumby

part number K5-A699 U/J kit staked steering bar code 9320278022315, code 34018 from cbc bearings,

did mine years ago with success. No need to send off for balancing as it don't revolve fast enough to cause any weird oscilations :)
I've only been able to investigate this last wednesday. A mob in town can replace them for $80 a piece. I'd like to know how you got the pressed marks out and how you replaced them to keep it all in place.
steptoe wrote:can't see L Series PS components on parade there
Not worth showing, they're welded back to back and not even useful if I were to weld an extension in place.
TOONGA wrote:I use the two long parts of an MY power steering knuckle with a 2 inch kit without the rubber block,you could do something similar and make a block to bolt between the two long bits and not have to weld anything.
Too long for the application I want it for, plus I NEED two knuckles in the extension for it to work.
TOONGA wrote:I notice you don't have an outback or liberty knuckle there either.
I don't have any parts vehicles in my possession to pull them from...
Venom wrote:So basically a steering link that is adjustable in length with no welding or the need for spline machining (which as Nacha found out is just ridiculously expensive).
Yep, that's the plan - easy to swap parts out if something goes wrong out bush. This has made me realise just how lucky I was that this issue occurred around the corner from home. Out bush and I'd be "proper stuck"...
Venom wrote:I thought Nacha had the right idea with the blocks in his steering extension. So essentially remove the rubber damper/spacer, replace it with a machined alloy block (preferable something that hugged the contours to essentially "lock it" in place), then bolt it all together.
Yeah I like what I saw with Nachaluva's extension. I reckon I'm not far off having this sorted, two ways of doing it:

- It's a broached spline, not machined. Apparently this is when the shaft is pushed through a die. I've got the contact of a a guy that *might* be able to make up a splined shaft that I'm after. I need a solution before I can get on to this but it's certainly something I want to pursue.

- The length of spline I need is about 10mm and will be clamped with about the same length of the factory spline. What I'm looking at doing is creating the spline I need - this should be sufficient for what I need and I'm comfortable in doing it.

Either way this will allow me to easily change either uni joint and also allow me to carry a spare unit without needing a whole second extension shaft :D

Cheers

Bennie
"The lounge room is not a workshop..."
Image
El Freddo's Pics - El_Freddo's youtube

User avatar
steptoe
Master Member
Posts: 11582
Joined: Thu Oct 06, 2005 10:00 am
Location: 14 miles outside Gotham City

Post by steptoe » Sun Aug 17, 2014 2:58 am

think it was a stone grinder bit in an air powered tool - had to have been- was so long ago I am lucky to remember I did it myslef, still got old one being steptoe :)
. And just a tack weld zap to hold 'em in. Still going strong :)

User avatar
tambox
Junior Member
Posts: 661
Joined: Tue Sep 09, 2008 5:06 pm
Location: Clayton again

Post by tambox » Thu Aug 21, 2014 9:44 pm

Those uni joints that bolt on and have a long splined sleeve on one side and shorter splined sleeve on the other side.
These can be cut up to make an extension.
Cut the longer splined sleeve off, before the uni, but after the splined inside finishes.
Drill and tap another 8mm bolt hole from the other side, then grind a little bit off where the bolt head goes to make it sit flat.
Notch out a piece of cut off steering column spline for the bolt to slide through.
You can cut the spline to a length to suit and use different length OEM unis to get the full length correct.
No welding, cheap and easy to carry a spare.
Works for 50mm lifts
L serious, still.

User avatar
El_Freddo
Master Member
Posts: 12504
Joined: Tue Oct 04, 2005 10:00 am
Location: Bridgewater Vic
Contact:

Post by El_Freddo » Sat Aug 30, 2014 12:36 am

tambox wrote:Those uni joints that bolt on and have a long splined sleeve on one side and shorter splined sleeve on the other side.
These can be cut up to make an extension.
Cut the longer splined sleeve off, before the uni, but after the splined inside finishes.
Drill and tap another 8mm bolt hole from the other side, then grind a little bit off where the bolt head goes to make it sit flat.
Notch out a piece of cut off steering column spline for the bolt to slide through.
You can cut the spline to a length to suit and use different length OEM unis to get the full length correct.
No welding, cheap and easy to carry a spare.
This could still work with what I need using two shaft pieces... But I have since found/created my solution. I ended up working a file for a few hours (fun) to get the shaft I needed. Two Manual steering knuckles, both with the long clamp threaded section were used.

I'll have to get a photo uploaded! I did have to pinch a knuckle from Redback to complete the unit but it works a treat. Redback has since had a knuckle with a new uni fitted, cost $44 and is using a Rodeo steering uni in the knuckle :D

Cheers

Bennie
"The lounge room is not a workshop..."
Image
El Freddo's Pics - El_Freddo's youtube

Post Reply

Return to “Conversions, Modifications and Performance Upgrades”