
Hi all , just curious to know if anyone has pics of the air chamber and duct that lives inside the guard on an EFI/MPFI L Series .
I have the line diagram from the WSM but pics would be great if available .
It looks like Sube went to a bit of trouble to dampen induction noise here and the holes in both ducts don't look real big IMO .
Cheers A .
Air Chamber inside guard on MPFI L Series ?
-
discopotato03
- Senior Member
- Posts: 2134
- Joined: Sun Mar 18, 2007 9:29 am
- Location: Sydney
-
Gannon

- Senior Member
- Posts: 4580
- Joined: Sat Nov 05, 2005 10:00 am
- Location: Bowraville, Mid Nth Coast, NSW
Yeah rip it out.
Current rides: 2016 Mitsubishi Triton GLS & 2004 Forester X
Ongoing Project/Toy: 1987 RX Turbo EA82T, Speeduino ECU, Coil-pack ignition, 440cc Injectors, KONI adjustale front struts, Hybrid L Series/ Liberty AWD 5sp
Past rides: 92 L series turbo converted wagon, 83 Leone GL Sedan, 2004 Liberty GT Sedan & 2001 Outback
------------------------------------------
-
steptoe
- Master Member
- Posts: 11582
- Joined: Thu Oct 06, 2005 10:00 am
- Location: 14 miles outside Gotham City
I ripped one out of my carby L wagon when stripping it last year, but not thought it worthy of a photo. My guess is that carb and efi are same unit. Great spot for redbacks to hide with the red bit just jumping out at you!!
Surely IF it is gonna limit air flow it will be upper rev range and how often do you stay there? I sort of drive mine between 3000 and 4000. I do not have this in use in my beast. Shares a a bolt or two with washer bottle I think in its mounting
Surely IF it is gonna limit air flow it will be upper rev range and how often do you stay there? I sort of drive mine between 3000 and 4000. I do not have this in use in my beast. Shares a a bolt or two with washer bottle I think in its mounting
-
discopotato03
- Senior Member
- Posts: 2134
- Joined: Sun Mar 18, 2007 9:29 am
- Location: Sydney
I managed to move the plastic arch liner enough to get a look at the chamber and its ducting . There looks to be two plastic Phillips head screws towards the front of the liner that won't come out .
I did try to remove the duct that picks air up from behind the headlight but you can't rotate it far enough to get it out of the chamber with the guard in place . I don't like to cut things if it can be avoided until I know they're going for good .
This 82T of mine will rev but the rate of increase after about 4800-5000 is slower than it could be .
I don't know for sure yet but I think it's possible that better than OE panel filters may not achieve a whole lot if that inadequate looking ducting creates a restriction upstream of the airbox .
BTW its possible that the flow through the completely std system isn't of any consequence with 115-135 Hp in mind but when you start demanding more airflow for extra power and a free revving engine I think it could be better .
There is a couple of ways I could go and they revolve around how std the engine bay needs to look and what style of filter I decide to use .
For straight out performance I think the way to go would be to ditch the airbox and run a K&N pod filter inside the guard away from the engine bay heat / hot air . I think you'd need to fabricate a tube to flange adapter and via a 3" or larger hole run 3" tube to the filter inside the guard .
For the more OE look you could fit a K&N panel filter in the std airbox and modify the lower half of the airboxes case to take a 3" inlet and get that through the sheet metal into the inner guard .
This car of mine is still quiet at wide open throttle and I reckon I can increase the size of the rear half of the exhaust and get the hot stuff out to reduce back pressure on the engine and turbo . If it gets the exhaust out more easily it should spin the turbo up sooner/faster than it does now .
If any airflow restrictions are creating a pressure drop upstream of the airflow meter then they need to go , this would show up as faster pressure rise on the boost/manifold pressure gauge (up to atmospheric) at low revs and into boost when the turbo spins up .
In the short term if people here have removed all the plastic crap from the inner guard and just had the duct into the oval hole I might give that a go .
I'm interested to know if they got any increase in induction noise and was it very noticeable .
Thanks , all cheers Adrian .
Id be getting rid of the flap AFM before anything else.
The trading corner : the stuff that I need ATM -
# Vortex Main Dash Surround / Bezel ANY COLOUR,
# Vortex Radio, # RHD Vortex 4speed auto digital dash,
# RH-Side parking (86+) Vortex wiper transmission,
# EA82 AWD 4EAT,
If you have them please PM me
# Vortex Main Dash Surround / Bezel ANY COLOUR,
# Vortex Radio, # RHD Vortex 4speed auto digital dash,
# RH-Side parking (86+) Vortex wiper transmission,
# EA82 AWD 4EAT,
If you have them please PM me
-
discopotato03
- Senior Member
- Posts: 2134
- Joined: Sun Mar 18, 2007 9:29 am
- Location: Sydney
As long as I can get close to zilch restriction upstream of the AFM that's about as far as I need to go .
I want to see if I can live with the ole 3 plug system and its vane AFM .
The rally people got 190 Hp's worth of air through that metre so maybe not as bad as people think .
I've chased up every thread I could find on USMB about getting more air/less restriction into the bottom half of the air box and some have got mixed results by drilling holes through it . I want cool air and the way to get it is through the inner guard .
I was back with the rally fabricators today to organise 2 1/2" plumbing for the second half of the exhaust . They agree that the simplest way to have a big feed into the air box is to get a piece of exhaust tube and ovalize it like the std system is but on a larger scale . Something in the 3-3 1/2" range of tube ovalized tube should be a huge enough hole to feed the box and not be difficult to get through the inner guard . The best is that it would be all out of site under the box .
Big hole and the K&N panel filter should be low restriction and lets face it this is important when all you have is atmospheric pressure pushing air into the air box .
Cheers A .
In basic terms to improve your "pump" you want to get the air in and out with least restriction and distubance - period
If you are not changing or modifying heads/internals/turbos/injectors/computers etc then at best you will gain say 10% power - not huge or worth disecting to the last detail.
The two best ways to do this is
1) less restrictive inlet - ditch everything before the AFM and replace with pipe the same size as AFM inlet and a pod filter with a cool air source, in the guard if you like.
2) less restrictive exhaust - assuming you don't want new headers (highly recomended on 82T's) then basicly the bigger you can make the dump directly off the turbo the better. In most race/rally setups you find the opposite of what you are looking at, ie BIG front section(3"), smaller rear section(2.5" on a 2L). I am not a guru but I know it is to do with eliminating restriction at the exhaust wheel and allowing for rapid expansion of gas in the first section followed by maintaining exhaust gas velocity (smaller pipe) in the back section.
85 Leone RX EJ20T Rally Car - plus spare rolling shell
91 Facelift 2.2 GX 4WD Legacy - SOLD
96 RSB Legacy
91 Facelift 2.2 GX 4WD Legacy - SOLD
96 RSB Legacy
-
discopotato03
- Senior Member
- Posts: 2134
- Joined: Sun Mar 18, 2007 9:29 am
- Location: Sydney
I'll do a quick run down of my 82T and its mods .
1) Was freshly rebuilt so rings and valve do seal properly .
2) Heads ported but there are limitations without welding the castings .
3) Cams are later MPFI NA ones , a little more duration and overlap .
4) Inlet is a Vortex spider that was smoothed up through its runners .
5) Header is a stainless steel one based on the TWE in 1 3/4 tube .
6) Turbo is a modified Garrett GT2554R but with the largest GT28 turbine .
7) Engine pipe from turbo and inc swivel joint and cat are 3"
Hopefully next week the 2 1/4 exhaust behind the cat will be reproduced in 2 1/2 inch tube and mufflers - straight through of course .
The feedback about the common MPFI L/XT4/XT6 air box is that the filter element itself is not the restriction so there is only very small gains to be had changing the element itself to a higher flowing one .
People OS are saying that if you can remove the restrictions in the lower half of the air box you are doing something useful by fixing one of the std boxes problem areas .
I reckon there are possibly ways to improve the passage in the upper half of the air box to the AFM .
Yes we did think about removing the air box completely and moving the AFM closer to the inner guard and housing a pod filter inside there .
Legally you are supposed to have an enclosed filter element and I imagine that's for fire reasons , don't know just want it to appear legal .
The other thing is it makes changing or cleaning the element much simpler having it in the engine bay .
So the aims are less pressure drop between the atmosphere and the turbos inlet and less exhaust restriction overall .
If the volumetric efficiency climbs then its all cake and will show up as more torque everywhere .
Should know more next week , cheers A .
1) Was freshly rebuilt so rings and valve do seal properly .
2) Heads ported but there are limitations without welding the castings .
3) Cams are later MPFI NA ones , a little more duration and overlap .
4) Inlet is a Vortex spider that was smoothed up through its runners .
5) Header is a stainless steel one based on the TWE in 1 3/4 tube .
6) Turbo is a modified Garrett GT2554R but with the largest GT28 turbine .
7) Engine pipe from turbo and inc swivel joint and cat are 3"
Right - then, not std.
If it was me I would...
1) ditch everything on the inlet before the turbo and replace with MAP sensor, straight pipe and pod - I appreciate the legal issue but Im in NZ where we can do what we like... to an extent
2) get a Liberty electronic boost control solanoid setup
3) Finish the zorst - the last section will complete the setup (headers, upgraded turbo, 3" front section) and you should notice a differance.
4) If you are so inclined upgrade the injectors - not sure on EA82T options??
5) get an aftermarket computer - you will likely need the MAP and boost solanoid to make this work, but seriously a tunable computer will make more differance than all the other mods you have done put together.
I am assuming you have some sort of IC setup? If not add that to the list before a computer.
85 Leone RX EJ20T Rally Car - plus spare rolling shell
91 Facelift 2.2 GX 4WD Legacy - SOLD
96 RSB Legacy
91 Facelift 2.2 GX 4WD Legacy - SOLD
96 RSB Legacy
-
discopotato03
- Senior Member
- Posts: 2134
- Joined: Sun Mar 18, 2007 9:29 am
- Location: Sydney
Controlling boost pressure is not a problem with these turbos , for the record my turbo uses the actuator intended for an XR6T so its supposed to regulate at about 6 1/2 pounds of boost .
When you size turbos a tad big on the hot side they tend to make good airflow at low boost pressures anyway . They also tend to climb into positive pressure slowly at the boost threshold so the actuator isn't being "rushed" so to speak and has no dramas doing its job .
I got a near new Turbosmart boost T for a good price so that adds a degree of adjustment .
I use a Tech Edge WB3A2 wide band and it doesn't read off unworkable AFRs though on boost it used to go really rich like more than 10 to one with the other 2.25 engine pipe . It also gets used in an R33 I have and I must put it back in the L Series when the exhaust has been enlarged . The last time it was in the Roo it gave no indication that the engine was running out of injector/fuel . I also have an adjustable FPR so could push that a little if fuel pressure was marginal .
My fuel pump was changed for a VL Commodore Turbo (RB30ET) one because I didn't trust the up to 24 year old OE style pump .
No not interested in aftermarket EMS , I do have a re branded Link G4 Storm but while the 3 plug system copes it can stay where it is .
A .
-
Gannon
- Senior Member
- Posts: 4580
- Joined: Sat Nov 05, 2005 10:00 am
- Location: Bowraville, Mid Nth Coast, NSW
1. Go to Bunnings and buy one of these
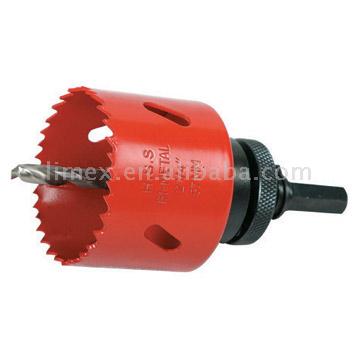
in an appropriate size (if you get a 90mm one you can also use it to install downlights in your loungeroom)
Put it in a cordless drill

2. Remove all the snorkel stuff from within your guard.

3. Remove the lid and filter from your airbox.
4. "Go to town" on the bottom half of your airbox and the panel behind it.
5. Grab a file and neaten up the sharp edges
6. Clean up all the metal shavings and give it a quick spray with paint
7. Put it back together and admire your work, while devising a plan to install an intercooler.
in an appropriate size (if you get a 90mm one you can also use it to install downlights in your loungeroom)
Put it in a cordless drill
2. Remove all the snorkel stuff from within your guard.
3. Remove the lid and filter from your airbox.
4. "Go to town" on the bottom half of your airbox and the panel behind it.
5. Grab a file and neaten up the sharp edges
6. Clean up all the metal shavings and give it a quick spray with paint
7. Put it back together and admire your work, while devising a plan to install an intercooler.
Current rides: 2016 Mitsubishi Triton GLS & 2004 Forester X
Ongoing Project/Toy: 1987 RX Turbo EA82T, Speeduino ECU, Coil-pack ignition, 440cc Injectors, KONI adjustale front struts, Hybrid L Series/ Liberty AWD 5sp
Past rides: 92 L series turbo converted wagon, 83 Leone GL Sedan, 2004 Liberty GT Sedan & 2001 Outback
------------------------------------------
Ongoing Project/Toy: 1987 RX Turbo EA82T, Speeduino ECU, Coil-pack ignition, 440cc Injectors, KONI adjustale front struts, Hybrid L Series/ Liberty AWD 5sp
Past rides: 92 L series turbo converted wagon, 83 Leone GL Sedan, 2004 Liberty GT Sedan & 2001 Outback
------------------------------------------
Yeah, Im sorry, but I do not agree with the 'paper element not a restriction on these engines' theory-K&N always better and easier flow, even on a lawn mower, and yes-you can get them! Think about it, try inhaling with a pair of jeans held over your mouth, and then a pair of stockings (also great for paint strainers FYI) over your mouth, which one is easier to suck through? - No matter how big or what 'religion' the person is. You ALWAYS go K&N or similar to a modified engine, they even go great in a standard engine. If your not convinced, go for a drive with the element out that will simulate the K&N.
The trading corner : the stuff that I need ATM -
# Vortex Main Dash Surround / Bezel ANY COLOUR,
# Vortex Radio, # RHD Vortex 4speed auto digital dash,
# RH-Side parking (86+) Vortex wiper transmission,
# EA82 AWD 4EAT,
If you have them please PM me
# Vortex Main Dash Surround / Bezel ANY COLOUR,
# Vortex Radio, # RHD Vortex 4speed auto digital dash,
# RH-Side parking (86+) Vortex wiper transmission,
# EA82 AWD 4EAT,
If you have them please PM me
-
discopotato03
- Senior Member
- Posts: 2134
- Joined: Sun Mar 18, 2007 9:29 am
- Location: Sydney
A bit hard starting a hole saw with nothing for the drill bit to locate on .
I want the hole to be ovalized because you can use larger diameter tube I think than the vertical high of the boxes duct section will allow .
The reason I don't like TMICs is because they do SFA at low speeds or stationary . Also , IMO , the air scoop makes a L Series look a bit boy racer ish . I think Ls need as much airflow space in the engine bay as possible to make the cooling system work . Also I can see a few things being hard to get at with the TMIC in place .
Actually another thing I have to get around to is making up a couple of spacer plates to get the bonnet hinges up a little for better flow through the bay .
Gannon did you get those pics I Emailed to you ? The ones of the lower box section and its duct would be good to see here .
Cheers A .
-
Gannon
- Senior Member
- Posts: 4580
- Joined: Sat Nov 05, 2005 10:00 am
- Location: Bowraville, Mid Nth Coast, NSW
You could get 2 x 60mm holesaws and drill them size by side, overlapping them to make an oval.
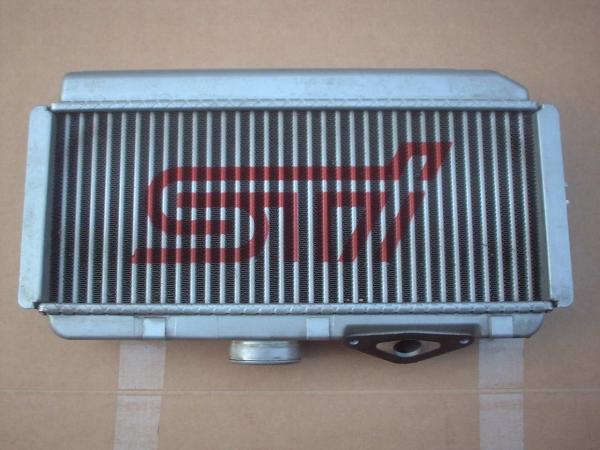
As for the intercooler, use a WAIC


As for the intercooler, use a WAIC
- Attachments
-
- aaa 015-800.jpg (30.89 KiB) Viewed 2858 times
-
- aaa 012-800.jpg (44.8 KiB) Viewed 2858 times
-
- aaa 011-800.jpg (34.07 KiB) Viewed 2858 times
-
- aaa 010-800.jpg (44.51 KiB) Viewed 2858 times
-
- aaa 008-800.jpg (45.63 KiB) Viewed 2858 times
Current rides: 2016 Mitsubishi Triton GLS & 2004 Forester X
Ongoing Project/Toy: 1987 RX Turbo EA82T, Speeduino ECU, Coil-pack ignition, 440cc Injectors, KONI adjustale front struts, Hybrid L Series/ Liberty AWD 5sp
Past rides: 92 L series turbo converted wagon, 83 Leone GL Sedan, 2004 Liberty GT Sedan & 2001 Outback
------------------------------------------
Ongoing Project/Toy: 1987 RX Turbo EA82T, Speeduino ECU, Coil-pack ignition, 440cc Injectors, KONI adjustale front struts, Hybrid L Series/ Liberty AWD 5sp
Past rides: 92 L series turbo converted wagon, 83 Leone GL Sedan, 2004 Liberty GT Sedan & 2001 Outback
------------------------------------------
-
discopotato03
- Senior Member
- Posts: 2134
- Joined: Sun Mar 18, 2007 9:29 am
- Location: Sydney
Hi Gannon , that last one tells the real story .
That's a twenty cent piece balanced in one side of the lower half of the air boxs inlet duct from the inner guard .
With a 3.5" "pipe" feeding into it you'd have to say getting more than the standard cars 115 Hp worth of air would be much easier .
Did you get the shot with the std Ryco element sitting sideways in the lower half ? Also the adjustable fuel pressure regulator .
Thanks again , cheers Adrian .
-
discopotato03
- Senior Member
- Posts: 2134
- Joined: Sun Mar 18, 2007 9:29 am
- Location: Sydney
Been up to Taree and back on the rails so no progress yet .
All I've done recently is replaced the rear pads with Bendix Ultimates and gone back with the red silicon type gunge to stop the squealing .
The exhaust work is booked for next Friday and the K&N filter will be in early next week .
I managed to get some freeby 2.5 and 3" tube offcuts though I really wanted some 3.5 to play with .
For those in the know is it possible to remove the plastic crap inside the guard without removing the guard ? I'd rather not butcher it unless I have to but I want it gone ATM . Is it bolted in together with the washer reservoir ?
A .
-
Gannon
- Senior Member
- Posts: 4580
- Joined: Sat Nov 05, 2005 10:00 am
- Location: Bowraville, Mid Nth Coast, NSW
All you have to remove is the front tyre and the plastic wheel arch liner. Then stick your head up there and pull it out. I think there are only 2 bolts holding it all together.
Current rides: 2016 Mitsubishi Triton GLS & 2004 Forester X
Ongoing Project/Toy: 1987 RX Turbo EA82T, Speeduino ECU, Coil-pack ignition, 440cc Injectors, KONI adjustale front struts, Hybrid L Series/ Liberty AWD 5sp
Past rides: 92 L series turbo converted wagon, 83 Leone GL Sedan, 2004 Liberty GT Sedan & 2001 Outback
------------------------------------------
Ongoing Project/Toy: 1987 RX Turbo EA82T, Speeduino ECU, Coil-pack ignition, 440cc Injectors, KONI adjustale front struts, Hybrid L Series/ Liberty AWD 5sp
Past rides: 92 L series turbo converted wagon, 83 Leone GL Sedan, 2004 Liberty GT Sedan & 2001 Outback
------------------------------------------

Don't have any pics handy, but yes, the air intake stuff is bolted together with the washer reservoir. You probably could drop it all out with the guard in place, but there's a bolt or two behind the front bumper that you'll struggle to reach.discopotato03 wrote: For those in the know is it possible to remove the plastic crap inside the guard without removing the guard ? I'd rather not butcher it unless I have to but I want it gone ATM . Is it bolted in together with the washer reservoir ?
A .
Are you planning to keep the intake under the guard, just with a bigger pipe?
Dane.
[SIGPIC][/SIGPIC]
1993 EA82/EJ18/EJ22/EJ22/EJ20/EJ22 L Series perpetual project
1993 EA82/EJ18/EJ22/EJ22/EJ20/EJ22 L Series perpetual project