Brumby Gearbox Rebuild
- Brumby Kid
- General Member
- Posts: 1297
- Joined: Sun Jul 17, 2011 9:19 pm
- Location: Belair S.A.
Yes I am talking about that stay. Bracket. Mine moves a lot.
Doesn't new bushes also help the sloppy shifter?
Cheers Cam
Doesn't new bushes also help the sloppy shifter?
Cheers Cam
When life gives you a corner, drop a gear, pitch, and stomp the loud pedal
Bianca: 1991 Subaru Brumby
My First / Project car
EA81 Rebuilt by Tony Knight from knight Engines
2" body lift
25" 185r14 Yokahama Delivery Star, light truck tyres
2" Sports exhaust
Rear Aguip step/bar
Liberty seats
Mums Car 08 Liberty Wagon
Bianca: 1991 Subaru Brumby
My First / Project car
EA81 Rebuilt by Tony Knight from knight Engines
2" body lift
25" 185r14 Yokahama Delivery Star, light truck tyres
2" Sports exhaust
Rear Aguip step/bar
Liberty seats
"Bianca"
[SIGPIC][/SIGPIC]
Dads Car: 02 Impreza WRX STi[SIGPIC][/SIGPIC]
Mums Car 08 Liberty Wagon
- El_Freddo
- Master Member
- Posts: 12566
- Joined: Tue Oct 04, 2005 10:00 am
- Location: Bridgewater Vic
- Contact:
Very good advice here ^^^ But I'd say that to stay a free man allow said "friend" out of the mine shaft and let him walk home; he should get the message that you're a) pissed with him & b) that your no longer friendsTOONGA wrote:1. remove 4 speed and place at very bottom of mineshaft.
2. forget where mine shaft is.
3. find a 1991 or later "L" series, flywheel, clutch and dual range box and rebuild that.
4. get a single piece tailshaft made.
5 install the goodies and never remember where the mineshaft is.
as for your friend who is telling you the 5 speed is only good for highway speeds, get him to help you put the 4 speed gearbox in the mineshaft. then remove the ladder while he is at the bottom.
Easier than a gearbox rebuild if you're doing bearings and synchros etc!!! No joke!Brumby Kid wrote:I'm liking this plan.
It's just whethe I can be fu(ked doing it.
A gearbox rebuild will always cost more than an engine rebuild. And this will definitely cost more than a 5 speed gearbox swap, even if you pay a grand for the gearbox!Brumby Kid wrote:And how much it will cost.
Well, if he's running 27's I agree with him, even then the 5 speed gives you more options to use, but from what my memory tells me you have no want of 27's. Even so a 5 speed is a step up on the 4 speed!Brumby Kid wrote:He's on offroading subarus. Reckons with 27's he only uses 5th on the highway and that the 4spd is a good little torquey gearbox for the brumby.
It's really chalk and cheese here for you situation to his situation.
The 5 speed box should be dropped in with the new engine
Too right!steptoe wrote:Keep putting your hand in your pocket ! *(for a gearbox build)*
Especially if you're not willing to nut it out when things pop out everywhere. Gearboxes are not for the faint hearted! But if you're willing to take your time, learn from any mistakes and are not afraid of things going wrong then go for the rebuild - or at least pulling it apart after you do the 5 speed conversionsteptoe wrote:Rebuild a 4 speed is much more work than doing the five speed conversion - what , with all those detent ball bearings and springs that pop out all over the place on ya, unexpectedly. Just be ready to see where they come from, mark them, bag them - forensically
5 speed is the way to go. When the brumby is loaded up I find on hill climbs that there really needs to be another gear between 3rd and 4th - this is where the 5 speed comes in!
Take note of the revs you use to go from 3rd to 4th. Pretty high sounding in third and pretty low sounding once in 4th. Vice versa when going from 4th to 3rd...
Go the 5 speed, you won't look back. I'm super keen to do it to Sunnie the Brumby, facilities and time are my hold back.
As for the fly wheel - keep the EA81 unit. This keeps your timing marks where you need them for the timing of the engine. AFAIK the EA82 flywheel's timing marks do not line up for the EA81 - but I could be wrong there.
To use the EA81's fly wheel you need to have the step machined down so that it is .815 of an inch deep - this means that the outside edge of the EA81 flywheel is machined down .1 of an inch to make it the same as the EA82 flywheel step. Any machine shop should be able to do this. This machining will allow you to run the EA82 pressure plate and thus the 5 speed gearbox with it's standard clutch fork and throw out bearing.
Cheers
Bennie
I am a bit confused.
I Silverbullet's write up on changing the bushes part of the job is replacing the bush on the bottom of the gearstick and it has a groove in it.
Silverbullet is saying install the bush with the groove up but when I bought my bushes from FROG he questioned the guys at his service workshop and they said install the bush down.
There has to be a right and a wrong way so which is it ?
showthread.php?t=18767&highlight=tutori ... ter+bushes
- El_Freddo
- Master Member
- Posts: 12566
- Joined: Tue Oct 04, 2005 10:00 am
- Location: Bridgewater Vic
- Contact:
Both are wrong. The L series 5 speed is the correct way to do itCliff R wrote:Silverbullet is saying install the bush with the groove up but when I bought my bushes from FROG he questioned the guys at his service workshop and they said install the bush down.
There has to be a right and a wrong way so which is it ?
Sorry, couldn't help myself on that one!
I've just been under the brumby to remove the tail shaft and have found that dreaded leak on the selector shaft of the 4 speed. I keep thinking of the 5 speed conversion, I've got all the bits but I would be keen to keep a one piece tail shaft and I'm sure this would cost some coin. I should really look into it!
Cheers
Bennie
Pending children will stop vomiting, I found my spare 4 speed linkage and cut a slit in it with 2x hacksaw blades on a frame together to give a wider cut. (couldnt be bothered getting the grinder out)
I intend to go with the groove down as this seems to be what Subaru are recommending, the book "How to keep your (72 to 84) Subaru alive actually states to put the groove down and my logic is with the groove at the bottom a sort of reservoir to keep some lubricant if the area gets dry.
I intend to go with the groove down as this seems to be what Subaru are recommending, the book "How to keep your (72 to 84) Subaru alive actually states to put the groove down and my logic is with the groove at the bottom a sort of reservoir to keep some lubricant if the area gets dry.
- Brumby Kid
- General Member
- Posts: 1297
- Joined: Sun Jul 17, 2011 9:19 pm
- Location: Belair S.A.
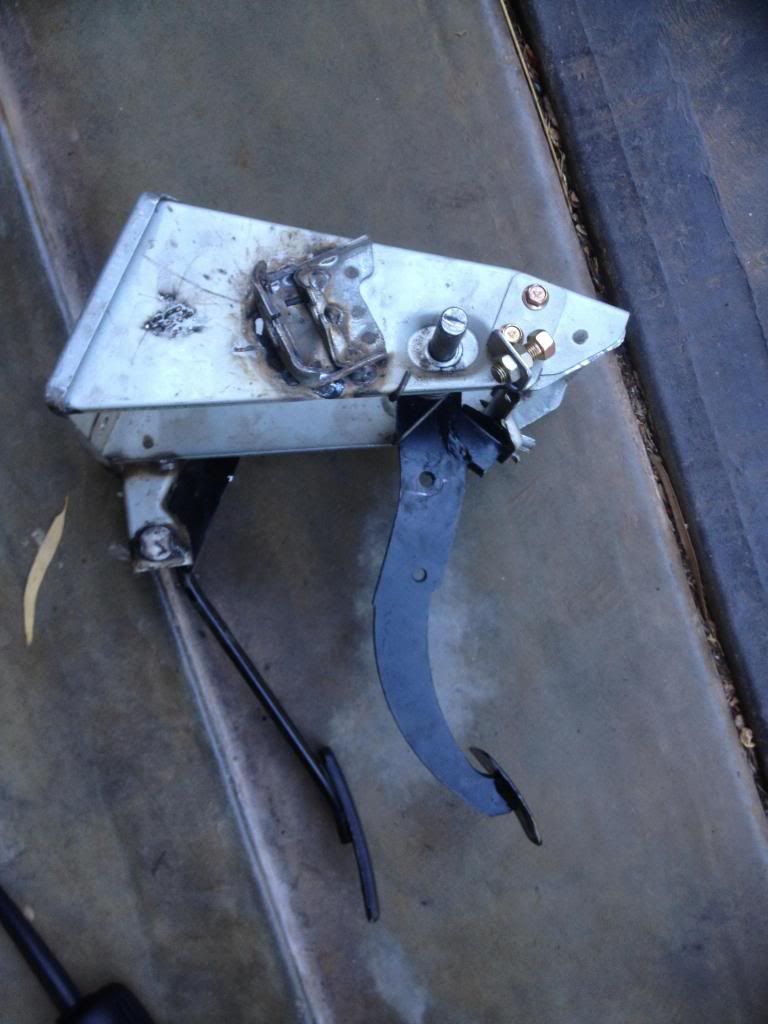
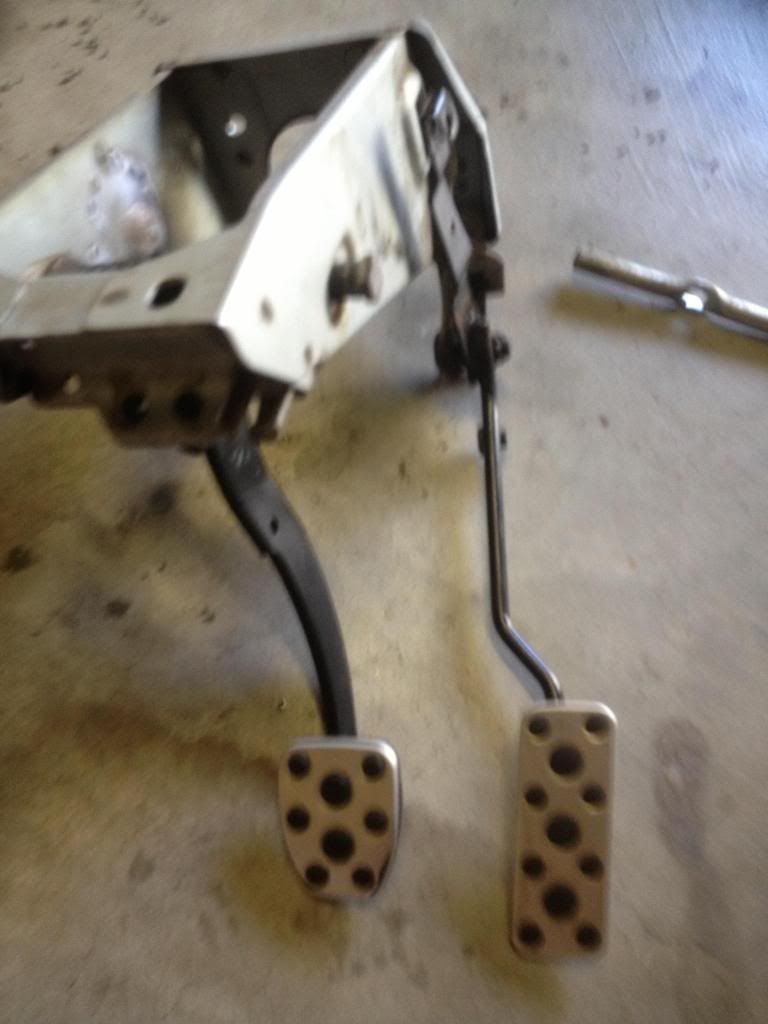
Welded up my clutch/ pedal box problem

Welded on my WRX accelerator pedal.

My gearbox. Help please.


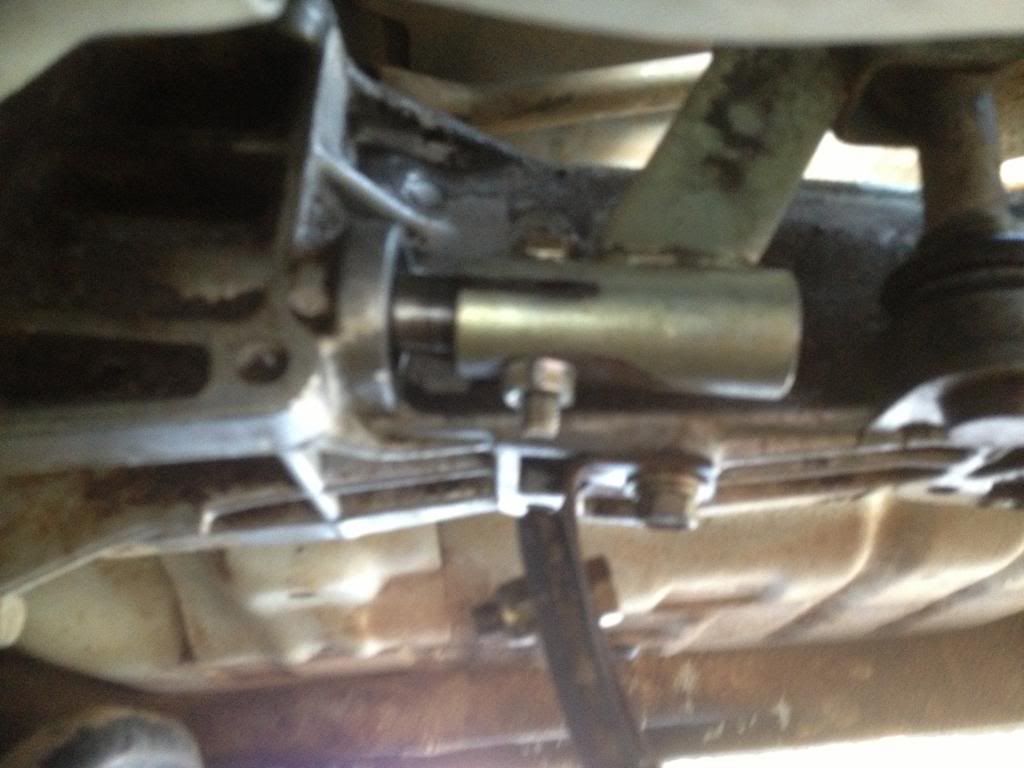
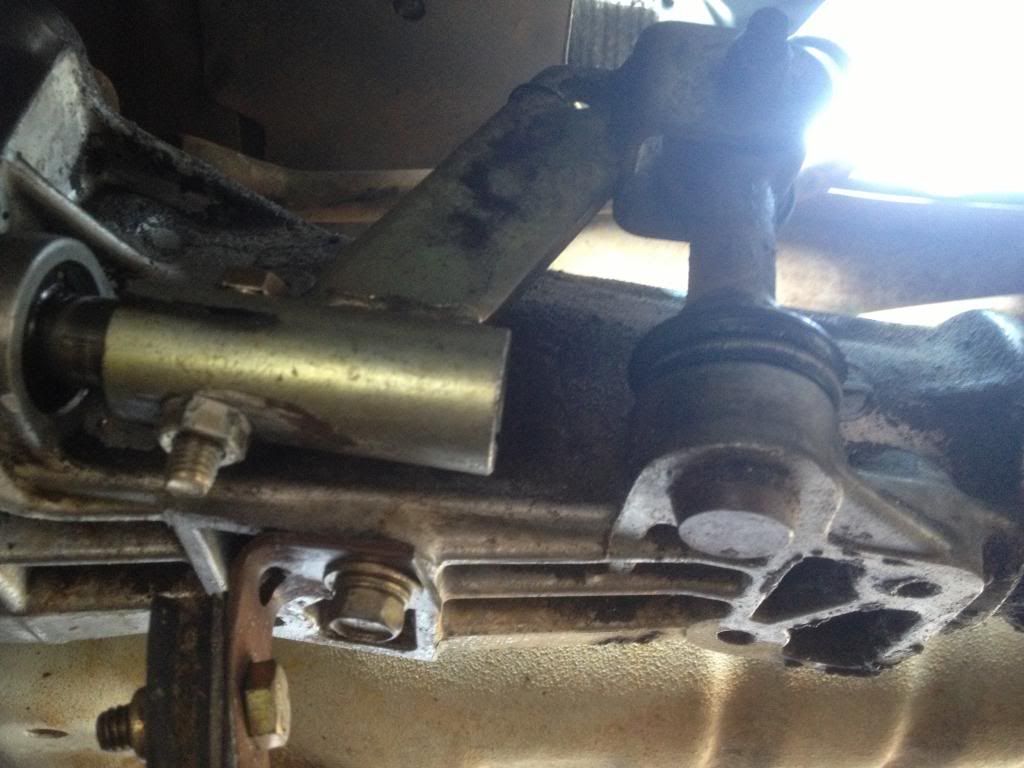
Now it's just to fix the sloppy shifter and get the clutch cable back on. Don't know how to hook it back up other than with great difficulty.
Cheers Cam

Welded on my WRX accelerator pedal.

My gearbox. Help please.


Now it's just to fix the sloppy shifter and get the clutch cable back on. Don't know how to hook it back up other than with great difficulty.
Cheers Cam
When life gives you a corner, drop a gear, pitch, and stomp the loud pedal
Bianca: 1991 Subaru Brumby
My First / Project car
EA81 Rebuilt by Tony Knight from knight Engines
2" body lift
25" 185r14 Yokahama Delivery Star, light truck tyres
2" Sports exhaust
Rear Aguip step/bar
Liberty seats
Mums Car 08 Liberty Wagon
Bianca: 1991 Subaru Brumby
My First / Project car
EA81 Rebuilt by Tony Knight from knight Engines
2" body lift
25" 185r14 Yokahama Delivery Star, light truck tyres
2" Sports exhaust
Rear Aguip step/bar
Liberty seats
"Bianca"
[SIGPIC][/SIGPIC]
Dads Car: 02 Impreza WRX STi[SIGPIC][/SIGPIC]
Mums Car 08 Liberty Wagon
- Silverbullet
- Senior Member
- Posts: 2896
- Joined: Mon Aug 23, 2010 6:20 pm
- Location: Adelaide
So yours already has the bolt mod but is still sloppy, same as mine. Could be the bolt is too small for the hole and/or a little bit loose...maybe slot needs widening. Also the bushes probably worn out...I'm in a similar position with mine since I "fixed" it last week but I have a feeling reverse is about to be lost again 
Will it ever end!?
-EA81 TWIN CARB!!!!
-L series 5 speed
-Custom paint job
-2" lift
-Full custom re-wire
-L series front end

-EA81 TWIN CARB!!!!
-L series 5 speed
-Custom paint job
-2" lift
-Full custom re-wire
-L series front end

Whenever I have cut the slot, I always do it along the full length.
This allows all the clamping pressure to be spread evenly along the full length, rather than trying to distort the clamping area.
I found partial cutting still left play in the uncut section and the bolt had be done up so tight, it was not practical.
Don't know if thats a better way, but it works for me.
L serious, still.
- Brumby Kid
- General Member
- Posts: 1297
- Joined: Sun Jul 17, 2011 9:19 pm
- Location: Belair S.A.
Which bushes are they? (Point to them?)
Where is this slot?
What should I be doing?
New bushes, bigger bolt, new slit,?
It's all still about as clear as mud.
Cheers Cam
Where is this slot?
What should I be doing?
New bushes, bigger bolt, new slit,?
It's all still about as clear as mud.
Cheers Cam
When life gives you a corner, drop a gear, pitch, and stomp the loud pedal
Bianca: 1991 Subaru Brumby
My First / Project car
EA81 Rebuilt by Tony Knight from knight Engines
2" body lift
25" 185r14 Yokahama Delivery Star, light truck tyres
2" Sports exhaust
Rear Aguip step/bar
Liberty seats
Mums Car 08 Liberty Wagon
Bianca: 1991 Subaru Brumby
My First / Project car
EA81 Rebuilt by Tony Knight from knight Engines
2" body lift
25" 185r14 Yokahama Delivery Star, light truck tyres
2" Sports exhaust
Rear Aguip step/bar
Liberty seats
"Bianca"
[SIGPIC][/SIGPIC]
Dads Car: 02 Impreza WRX STi[SIGPIC][/SIGPIC]
Mums Car 08 Liberty Wagon
Sorry clarification time, well I knew what I meant:D
The "linkage" that bolts onto the gearbox selector shaft, that you cut a slot into, to allow the newly fitted bolt to tightly clamp it to the selector shaft.
I cut this slot all the way along this "linkage", to allow the bolt, to let the "linkage" fully clamp the selector shaft.
If the bolt is loose (wrong diameter) in the selector shaft/linkage, it always come loose.
Carefull with drilling the selector shaft, to big a bolt hole and it can break off.
I have used whitworth or fine AF bolts to get them tight in the selector shaft/linkage, rather than drilling to the next metric size.
Hope thats clearer and I still know what I mean;)
L serious, still.
- Brumby Kid
- General Member
- Posts: 1297
- Joined: Sun Jul 17, 2011 9:19 pm
- Location: Belair S.A.
So I need to clamp it on tighter.
To do this I can cut the slot further and tighten the bolt. As well as tightening the bolt and making sure that the bolt is the right size.
What is there stock?
How do I get it off to do the work?
Cheers Cam
To do this I can cut the slot further and tighten the bolt. As well as tightening the bolt and making sure that the bolt is the right size.
What is there stock?
How do I get it off to do the work?
Cheers Cam
When life gives you a corner, drop a gear, pitch, and stomp the loud pedal
Bianca: 1991 Subaru Brumby
My First / Project car
EA81 Rebuilt by Tony Knight from knight Engines
2" body lift
25" 185r14 Yokahama Delivery Star, light truck tyres
2" Sports exhaust
Rear Aguip step/bar
Liberty seats
Mums Car 08 Liberty Wagon
Bianca: 1991 Subaru Brumby
My First / Project car
EA81 Rebuilt by Tony Knight from knight Engines
2" body lift
25" 185r14 Yokahama Delivery Star, light truck tyres
2" Sports exhaust
Rear Aguip step/bar
Liberty seats
"Bianca"
[SIGPIC][/SIGPIC]
Dads Car: 02 Impreza WRX STi[SIGPIC][/SIGPIC]
Mums Car 08 Liberty Wagon
The first thing to do is check it for movement, no point in doing something if its not required.
Get under the car and have somebody else move the gear lever and see where the "play" is.
Check 1. the linkage to selector shaft connection, 2. the pivot ball connection on the bottom of the gear lever, 3. the gearlever to linkage bolt/bush.
Repairs:
1. Remove linkage (unbolt selector shaft bolt, remove gearlever bolt, remove spring (if it is has one). Carefully lift the rubber boot off that covers the gearlever pivot ball, lift gearlever upwards. Removing the gearlever to floor dust boot can make this easier, done from the top, inside console). With the linkage out, cut the slot all the way along the side. Bolts are trial and error, but make sure it is a hardened bolt/cap screw, with a nyloc nut.
2. depends on wear of pivot ball on bottom of gear lever, dont think OEM pivot plastic cups are available anymore. Socket can be worn. Check it all and work it out. There should be suggested repairs listed on this site somewhere.
3. Repace bushes.
Have fun Cam.
L serious, still.
- Brumby Kid
- General Member
- Posts: 1297
- Joined: Sun Jul 17, 2011 9:19 pm
- Location: Belair S.A.
Thanks tambox.
I think I have a general idea of what to do now.
Cheers Cam
I think I have a general idea of what to do now.
Cheers Cam
When life gives you a corner, drop a gear, pitch, and stomp the loud pedal
Bianca: 1991 Subaru Brumby
My First / Project car
EA81 Rebuilt by Tony Knight from knight Engines
2" body lift
25" 185r14 Yokahama Delivery Star, light truck tyres
2" Sports exhaust
Rear Aguip step/bar
Liberty seats
Mums Car 08 Liberty Wagon
Bianca: 1991 Subaru Brumby
My First / Project car
EA81 Rebuilt by Tony Knight from knight Engines
2" body lift
25" 185r14 Yokahama Delivery Star, light truck tyres
2" Sports exhaust
Rear Aguip step/bar
Liberty seats
"Bianca"
[SIGPIC][/SIGPIC]
Dads Car: 02 Impreza WRX STi[SIGPIC][/SIGPIC]
Mums Car 08 Liberty Wagon
- Silverbullet
- Senior Member
- Posts: 2896
- Joined: Mon Aug 23, 2010 6:20 pm
- Location: Adelaide
It's not very complicated, once you're in there and can see what's what the rest is easy. You need to start on the inside of the car first, removing all the interior, gear stick etc before you can take the linkage out.
Will it ever end!?
-EA81 TWIN CARB!!!!
-L series 5 speed
-Custom paint job
-2" lift
-Full custom re-wire
-L series front end

-EA81 TWIN CARB!!!!
-L series 5 speed
-Custom paint job
-2" lift
-Full custom re-wire
-L series front end

L Series Gear box
Mate I'm not sure but the wrecking yard in Brisbane where I live has a few L series E81 Leones and now that you've mention bloody gear box problems I shitting a little cause my brumbies done 420ks and the syncros are a bit hard. I going down right now to check out the gear boxes on these L series.Maybe someone else can tell us whether a L Ser Leone Gear box fits Brumby. BOSS Wreckers in Brisbane the joint.Brumby Kid wrote:I've decided that my gearbox is rat shit.
Its sloppy / hard to find gears
Clutch feels bad, doesn't spring back like it should/ soft down and up. not soft down, hard up.
According to Subaru (ages ago) Selector shaft seal leaking, diff side seals leak.
I've gone OFF the 5sp, too much work and a guy i know reckons you only use 5th at highway speeds, he owns both and prefers the 4sp for the Brumby.
So my plan is to buy one from wreckers and slowly do i up, then change them over.
What do you do when you rebuild a gearbox?
All i know is that it would be Bearings and seals.
What else is there? I know nothing about the parts of a gearbox
Cheers Cam
- Rodeo4jake
- Junior Member
- Posts: 297
- Joined: Fri Oct 19, 2012 5:42 am
- Location: Tylden Victoria
- TOONGA
- Elder Member
- Posts: 5338
- Joined: Sat May 30, 2009 10:15 am
- Location: Australind closer to where they divided by zero
- Contact:
the "L" series box will fit into a brumby with out much of a fight
read the thread below for all the answers.
showthread.php?t=11821
TOONGA
read the thread below for all the answers.
showthread.php?t=11821
TOONGA

