HI guys,
Ok so as andrew said, if i could do my own conversion i should be able to do my front bearings.
I would like to know if someone knows the step by step process in changeing the bearings and if they could explain.
Also i understand that some can be hard to get out so any tricks or special tools that would help would be apriciated.
And how long does it normally take to do both sides?
And finally with your experience, what brand of beaings and from where should i by them or can i just get the cheapest i can find?
Thx guys
thx
L series front bearings
L series front bearings
The project, EJ22 --->>> EJ25 Quad CAM:D touring wagon

Thinking of going on holidays on a little paradise island, Check out http://www.dodolidays.com

Thinking of going on holidays on a little paradise island, Check out http://www.dodolidays.com

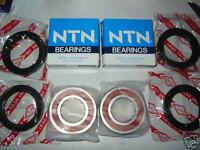
Get bearings from a bearing shop, not a car shop.
The procedure:
Crack the hub nut, jack the car up, remove wheel, remove brake caliper asnd bracket, remove the hub and rotor.
Undo strut base bolt, tie rod end stud and ball joint stud. Lean down on the control arm with your foot to slide the the steering knuckle off the strut, then lift the steering knuckle off the ball joint.
Sit the steering knuckle on the bench/wherever you like to work.
Flick the old seals out.
Between the inner and outer bearings is a spacer which floats in grease. Push it to one side so you can see the inside faces of the bearings. Get a suitable punch, put it against the inside of one bearing start tapping. Move around the circumference of the bearing, pushing the spacer aside as you go. (The bearings come up aginst a stop in the middle of their housing, so you can't press them right through from the outside.) This step will make more sense once you start doing it.
Flip the knuckle over and bash the other bearing out.
Clean everything up. Work lots of fresh grease into the new bearings and the inside of the housing.
Bash the new bearing in, making sure it stays square.
Flip over, put the spacer in with lots of grease around it, bash the other bearing in.
Insert new seals.
Put everything back together.
Repeat for the other side.
[SIGPIC][/SIGPIC]
1993 EA82/EJ18/EJ22/EJ22/EJ20/EJ22 L Series perpetual project
1993 EA82/EJ18/EJ22/EJ22/EJ20/EJ22 L Series perpetual project

I got my bearings from Coventrys but I think they are probably cheaper directly from CBC bearings.
Make sure you get the sealed type - the ball bearings themselves are obscured from view by coveres in the sides. These are more resistant to mud, sand etc.
Lemme see....this should basically cover it.
First side;
- Remove the split pin from the large castellated nut
- Use a 36mm socket and large breaker bar to crack the thread on this bolt and loosen it slightly
- Put front of car on axel stands (or an umbrella stand) and chuck a few rims under for added safety
- Take front wheels off
- Remove the roll pin from the inner CV cup
- Take the two bolts out of the strut which hold it in the top of the hub
- Stomp on the top of the hub with your boot to separate it from the strut - at this point the inner CV cup may slip itself off the gearbox stub
- Finish taking the castellated nut off (take note of exactly which way the flat washer goes, it isn't actually flat)
- Unplug the inner CV cup off the gearbox stub if it didn't fall off already
- Push the outer CV through the hub and remove the driveshaft all together - you may need to hold a softish block of wood against the outside part and give it a few thumps, sometimes they can be stuck pretty good - key point here is to protect the thread because if you bugger it up it's time for a new outer CV joint
- Unbolt the steering rack tierod ends from the hub and separate them.
- Now the only thing holding the hub to the car is the balljoint. Either undo the nut that holds the balljoint in the hub, or undo the nut that holds the balljoint to the control arm and separate them - doesn't really matter which way you do this.
- Now the hub is completely separate to the car. There are two bearing races in it, an outer and an inner (they are both identical) and two round rubber seals (a big and a small).
- Unbolt the outer hub bit and take the brake disc rotor off
- Remove the rubber seals by levering them out with a flat screwdriver. Remember which one goes where (big, little), I can't at the moment.
- Now to remove the bearings. There are probably a few methods to doing this but this is how I've done it.
- Rest the hub up on two blocks of wood so it's raised and the middle bit dangles down towards the ground instead of sitting on it.
- Use a crappy old socket extension bar (or some other similarly sized rod of metal) and pass it through the hub and push it against the bearing race which is at the bottom.
- Tap the bearing race out, a few taps alternating opposite sides until it gradually works look.
- Flip the hub over and do the other side.
- There is a metal ring in the middle which will fall out, don't loose it and don't forget about it.
- At this stage you will be completely filthy with old dirty grease absolutely everywhere so take the opportunity to clean everything up. Basically you want to completely clean the hub and have it free from all sand etc. Then move to a new cleaner location to re-assemble it.
- Grease the inside of the hub abit then start installing the first bearing race. Tapping it in with the metal rod is abit dangerous because you can easily slip and bash the side of the bearing and ruin the side seal so I find it safer to use one of the old bearing races - hey it's exactly the right size! Just make sure it's clean first.
- Then put the middle ring thing back in the middle.
- Then install the second bearing race in the other side.
- Then install the two rubber seals - with enough grease you should be able to actually push these in with your fingers as they flex a little.
- Now pack the hell out of the middle of the hub and the bearings with axel grease, too much is okay as it squeezes out when you put it back on the car anyway.
- Put the hub back on the car and tighten the balljoint up.
- Re-insert the driveshaft through the hub (this can be a real bastard - sometimes it's actually easier to do this outside of the car and re-install the hub to the car with the driveshaft already in it).
- Plug the driveshaft back into the gearbox.
- Re-insert the strut back into the top of the hub. You will probably need to push the hub down with your boot to get this to work, it's abit of a squeeze.
- Re-tighten the bolts from the strut to the hub.
- Put the castellated nut and washers back on, not tight yet.
- Put wheel back on and drop the car back onto the wheel.
- Tighten the castellate nut up with the 36mm socket and breaker bar, excess grease will come out in a snake. This needs to be done up *very tight*.
- Go do the other side.
Abit more grease will probably come out all over your nice clean wheels over the next week or so.
Here's a few pics of the before and after of the last ones I did for my sedan, doesn't really show technique tho sorry.
http://members.iinet.net.au/~carine3/IMAGE_00017.jpg
http://members.iinet.net.au/~carine3/IMAGE_00018.jpg
http://members.iinet.net.au/~carine3/IMAGE_00015.jpg
http://members.iinet.net.au/~carine3/IMAGE_00016.jpg
How long will it take?
Well how long is a piece of string.....these days I could probably do both sides in about an hour or two but the first time I did it took about 3 hours for the first side and about an hour for the second. Really just depends how you work.
Good opportunity to put new ball joints in.
Lol dane posted his while I was still typing
EZ30 L series - Monsterwagon
https://www.ausubaru.com.au/viewtopic.php?f=71&t=26163
https://www.ausubaru.com.au/viewtopic.php?f=71&t=26163
cool, One last thng, Would you guys have a part number for the sealed bearing?
Cool cool, its pretty simple then, i thought it would be worst. I got quoted from coventries $72 per side (timken). Veale and autopro are average $35 but not sure what brand. Statewide only have the timken bearings for $31 per side but no seals,gonna take a week for them to get them. I have a mate in a mechanical course at tafe and they can get the timken for 42 but they have to fix the car themself.
I'll try CBC tomorrow. How do i know if they are the sealed bearings, whats the difference?
When i get the bearings off, can i just remove the disk rotors? as i might get them machined. Looks like they got some marks. hopefully they are not at the limit yet.
ALSO what grease should I use? Brand etc
Loved the joke about the umbrella stand..., Lol hahahaha. Was that because of my picture??? haha
Also i wanted to ask. From putting the EJ22 and the EA box, i now have a gap under where the flywheel is. and with that rainy weather water is getting in and the thrust bearing is now making noise. It stops with two dry days. I have put some WD40 and silicone spray to prevent rust and stop noise.
But my worry now is that when i'll go offroad, sand and mud will get in there. I will be getting the lit kit soon and ill have the opportunity to remove the cross member and able to acess that area better. What could i use to blok that gap? the metal plate from the EJ box? or what did you guys use?
thx
The project, EJ22 --->>> EJ25 Quad CAM:D touring wagon
Thinking of going on holidays on a little paradise island, Check out http://www.dodolidays.com
Thinking of going on holidays on a little paradise island, Check out http://www.dodolidays.com
-
phillatdarwin
- Junior Member
- Posts: 532
- Joined: Thu Dec 25, 2008 6:11 pm
- Location: 93GL / 86rx ea82t Darwin NT
Can't remember the brand, I've just gotten them from Coventries.
Some random google images....
These are unsealed;
http://www.carspartsguide.com/img/179610.jpg
These are sealed;
http://i1.ebayimg.com/08/i/000/e3/4a/3057_2.JPG
See how there is a red kindof wall that seals in the ball bearings so u can't see them?
I think u are missing the little metal protective cover that's supposed to cover that gap when you see the flywheel. Should be able to find one off a buggered engine and pop it on. If the thrust bearing is making noise it probably needs replacing.
EZ30 L series - Monsterwagon
https://www.ausubaru.com.au/viewtopic.php?f=71&t=26163
https://www.ausubaru.com.au/viewtopic.php?f=71&t=26163
do you have one of the metal protection covers?
Or anyone here in perth?
Or anyone here in perth?
The project, EJ22 --->>> EJ25 Quad CAM:D touring wagon
Thinking of going on holidays on a little paradise island, Check out http://www.dodolidays.com
Thinking of going on holidays on a little paradise island, Check out http://www.dodolidays.com
Hi guys, I have started on the hub bearings. Looks like i'll be ok. I will be some pics up tomorrow. CAn some expalin how to put pics up so that the pic comes/appears directly on the page and not in link form? As in the link form i am at my limit:P
thx
thx
The project, EJ22 --->>> EJ25 Quad CAM:D touring wagon
Thinking of going on holidays on a little paradise island, Check out http://www.dodolidays.com
Thinking of going on holidays on a little paradise island, Check out http://www.dodolidays.com
-
phillatdarwin
- Junior Member
- Posts: 532
- Joined: Thu Dec 25, 2008 6:11 pm
- Location: 93GL / 86rx ea82t Darwin NT
Also i was thinking, since like andrew said its a Bitch to get the cv's in adn out of the hub. Would it be a good idea to get new front cv joints?
thx
The project, EJ22 --->>> EJ25 Quad CAM:D touring wagon
Thinking of going on holidays on a little paradise island, Check out http://www.dodolidays.com
Thinking of going on holidays on a little paradise island, Check out http://www.dodolidays.com
-
El_Freddo

- Master Member
- Posts: 12708
- Joined: Tue Oct 04, 2005 10:00 am
- Location: Bridgewater Vic
- Contact:
When you post the image you need to find an appropriate host site for the image - I use image shack.
When you want to show an image, you select said image from the host site then select the code that shows the image in the post - Image shack gives you a few options - I go for the "forum" code, its works for me everytime. Just make sure the image is the right size - 800x600 is the size I use in most of my images.
Hope this helps.
Cheers
Bennie

-
phillatdarwin
- Junior Member
- Posts: 532
- Joined: Thu Dec 25, 2008 6:11 pm
- Location: 93GL / 86rx ea82t Darwin NT
-
phillatdarwin
- Junior Member
- Posts: 532
- Joined: Thu Dec 25, 2008 6:11 pm
- Location: 93GL / 86rx ea82t Darwin NT
-
El_Freddo
- Master Member
- Posts: 12708
- Joined: Tue Oct 04, 2005 10:00 am
- Location: Bridgewater Vic
- Contact:
Yep, there's a few around, Image shack (http://www.imageshack.us) was the first one I came across, you can view my images via the link in my sig.
Cheers
Bennie
Cheers
Bennie
Ok guys,
I DID THEM :P
So yeah thats a little pic, went for a test drive and no noise at all. Is it me or does the car drive better?? anyway its a great feeling..

UNFORTUNATELY... yep, my stupid water pump seal is leaking:.(
I have this other blown head engine sleeping with 185 psi in cyl 1, 190 in 2, 200 in 3 and 180 in 4. Is that good? Would it be worth fixing? not sure it that 20psi differance is bad! The test was done with engine turning, no fuel and throttle fully open. car speedo had 280xxx
Im thinking of 1/2 rebuilding that one if comp is ok. So i was wandering if anyone would have the following parts new that they never used and would like to sell. Head gasket set, anything from just the gaskets to the complete set, Head bolts, Water pump, oil seals, rocker cover seal, T belt and maybe pulleys, etc.
I tested the one in the car at the moment and got 180 psi in cyl 1, 185 in 2, 200 in 3 and 175 in 4. What is a good compression value? If that ok? I tested it when engine was cold. Should i just do the pump and TBelt on it. this one has 280xxx too.
thx
The project, EJ22 --->>> EJ25 Quad CAM:D touring wagon
Thinking of going on holidays on a little paradise island, Check out http://www.dodolidays.com
Thinking of going on holidays on a little paradise island, Check out http://www.dodolidays.com
If both engines have 280,000kms and one has munted compression and the other just needs a new water pump....I'd replace the water pump and keep using that engine.
Then if you are keen you could rebuild the other motor propperly over time so it's ready as a good spare when the other one finally gives up.
*edit - or you could buy my ~250,000kms engine which is a good runner straight off
Then if you are keen you could rebuild the other motor propperly over time so it's ready as a good spare when the other one finally gives up.
*edit - or you could buy my ~250,000kms engine which is a good runner straight off
EZ30 L series - Monsterwagon
https://www.ausubaru.com.au/viewtopic.php?f=71&t=26163
https://www.ausubaru.com.au/viewtopic.php?f=71&t=26163
-
El_Freddo
- Master Member
- Posts: 12708
- Joined: Tue Oct 04, 2005 10:00 am
- Location: Bridgewater Vic
- Contact:
Well done on the image! To get a larger image (to the size you uploaded them - 600x800 is what I use, see pic below), use the top "forum" address, simply copy and paste, it'll give you an image this size:guyph_01 wrote:Ok guys,
I DID THEM :P
So yeah thats a little pic, went for a test drive and no noise at all. Is it me or does the car drive better?? anyway its a great feeling..

^ I thought it appropriate, since you were talking about your bearings, this was when I did my rears - the first time around, and I fitted the discs at the same time...
All the best with your water pump, they're a bugger to change/fix!
Cheers
Bennie