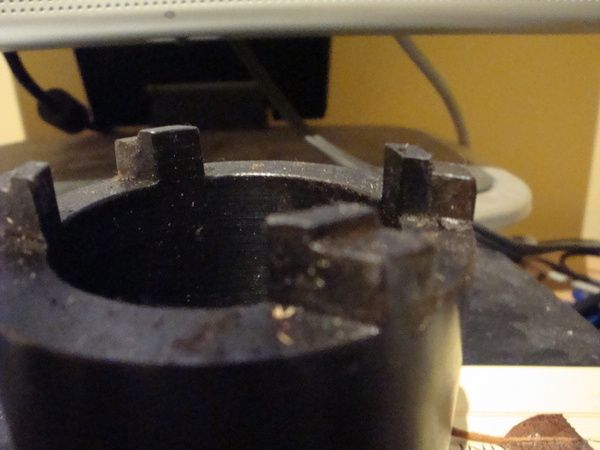
MY/L series rear wheel bearing tool
Posted: Mon Jun 30, 2014 4:39 pm
Yes the weird nut on the inside with only 2 parallel slots for drive.
I've seen some creative solutions to this little problem on this site before, and when I came to replacing the rear wheel bearings on my wagon I thought 2 pieces of flat bar weren't going to cut it Although perfectly sufficient I'm sure, some guys don't leave home without theirs. So I decided to do it the way I know how and machine a purpose made tool. Found enough scraps at work and got a spare half an hour.
The drive end was a piece of hollow round bar bored out to slightly smaller diameter than the inside of the nut itself. Outside diameter turned to .5mm larger than the OD of the nut. Then the drive teeth machined out on the milling machine to 5mm deep, perfect fit! I put a big chamfer on one end as a welding prep and welded it to a piece of thick wall compressed air pipe that happened to be the perfect diameter. Then turned a big thick washer to weld at the other end, with a hole in it in which to weld a 1/2" drive sacrificial socket.
And it works well! well mostly anyway. If I did it again I would make it half the length it is or less. I didn't have the stub axles with me at work when I made this so had no idea how long to make it. As it is it's impossible to use with the rear hubs on the car. Being so long it's very easy for it to tilt and slip off the nut, smacking your fist into another part of the car. Also I would not bore out the insides to large. I would make the internal diameter a neat fit around the stub axle itself, to act as a guide.
Anyway have some pics:


I've seen some creative solutions to this little problem on this site before, and when I came to replacing the rear wheel bearings on my wagon I thought 2 pieces of flat bar weren't going to cut it
The drive end was a piece of hollow round bar bored out to slightly smaller diameter than the inside of the nut itself. Outside diameter turned to .5mm larger than the OD of the nut. Then the drive teeth machined out on the milling machine to 5mm deep, perfect fit! I put a big chamfer on one end as a welding prep and welded it to a piece of thick wall compressed air pipe that happened to be the perfect diameter. Then turned a big thick washer to weld at the other end, with a hole in it in which to weld a 1/2" drive sacrificial socket.
And it works well! well mostly anyway. If I did it again I would make it half the length it is or less. I didn't have the stub axles with me at work when I made this so had no idea how long to make it. As it is it's impossible to use with the rear hubs on the car. Being so long it's very easy for it to tilt and slip off the nut, smacking your fist into another part of the car. Also I would not bore out the insides to large. I would make the internal diameter a neat fit around the stub axle itself, to act as a guide.
Anyway have some pics:


